Vietnamese Chicken Rice Porridge – Chao Ga with Instant Pot

Chao Ga - rice porridge

In this article, we will be showing you how to make a Vietnamese Chicken Rice Porridge also known as Cháo Gà using an Instant Pot. The Chicken Porridge is a rice gruel for breakfast, lunch, or dinner. It is light yet filling. Not to worry if you do not know what Instant Pot is. Please click ==> Review on Instant Pot to know more.

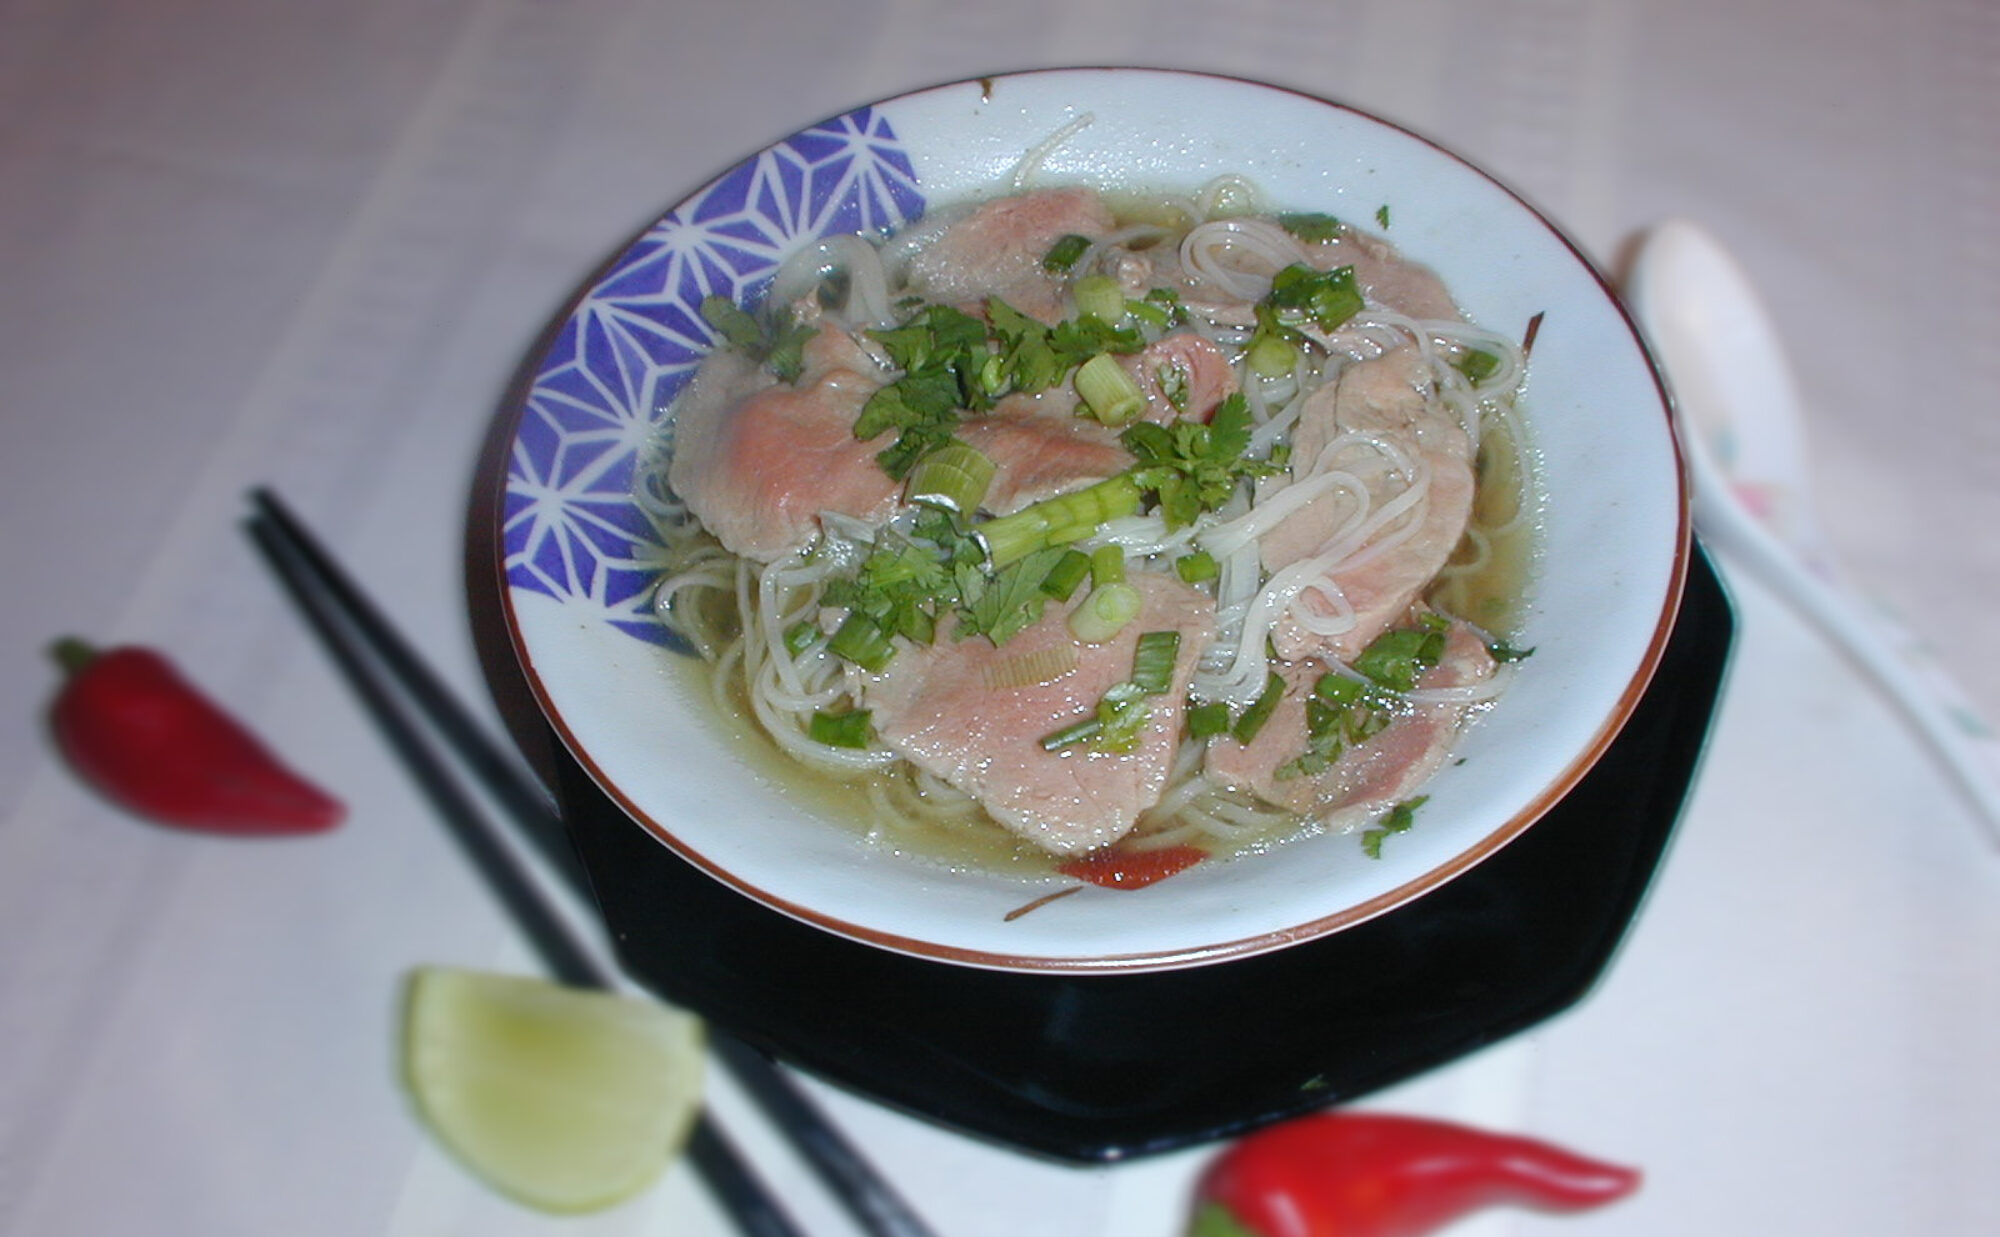
Like chicken soup in the United States, it is used as a Vietnamese cold remedy. Many people believe that the warmth of the broth and the wholesomeness of the chicken help regain one’s strength. It kinda likes chicken noodle soup instead of noodles we use rice.Chao Ga - rice porridge 
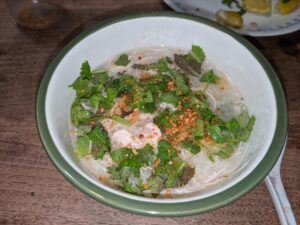
This recipe can be used with minimally 4 ingredients: chicken, rice, water, and salt. However, the extra ingredients enhance the flavor. If we have the extra ingredients, why not use them. There are many ways to make Cháo Gà. My way is one of many. I like to start with simple successes and then add on.

We had a live video of making Chao Ga online — Here is the video:


As the owner of this website, I tracked down special deals for some products or services mentioned herein. As an Amazon Associate, I earn from qualifying purchases. When you use the link from this page to make a purchase, I may receive a small commission, and you may receive a great bargain – Full Disclosure.

Ingredients

This recipe serves 4 people. It takes about 60 to 70 minutes to complete the whole process.

  • 2 chicken breasts, approximately 1 to 2 pounds
  • 1 cup of Jasmine rice or your favorite rice
  • 6 cups of water (or optional chicken broth)
  • ½ an onion or ¼ cup finely chopped onion
  • 1 to 2 slices of ginger
  • 2 tablespoons fish sauce or soy sauce
  • ¼ teaspoon salt
  • ¼ teaspoon sugar
  • ¼ teaspoon black pepper
  • ½ lemon, quartered
  • ¼ cup of finely chopped fresh cilantro (optional)
  • ½ pound bean sprouts (optional)
  • Sprinkle of ground roasted peanuts (optional)
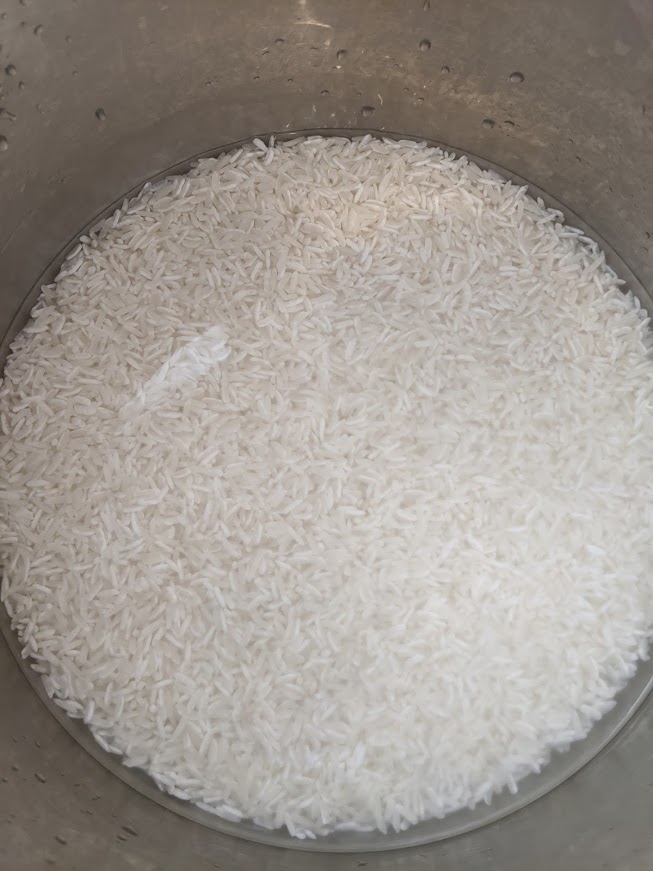
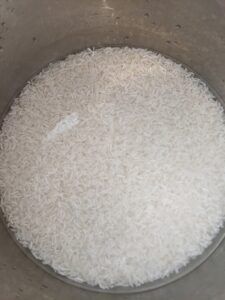
Prep the Rice

First, put a cup of rice in a bowl and rinse the starch from the rice. When the water becomes clear, drain the water. It’ll take approximately 2 to 3 minutes. The main reason I clean the rice because sometimes we find unwanted items such as little pebbles, dirt, or even bugs. The bugs are not uncommon especially when you are keeping the bag of rice in the moist area and/or on the ground.

Roast the rice in a frying pan or an IP (Instant Pot) using sauté mode. Make sure the saute heat is medium or low. Constantly, stir the rice every 30 seconds or the rice will burn and stick to the pan. Roast the rice until all the water has evaporated and the rice is dried. This will take about 3 to 4 minutes. You don’t have to roast the rice. This method adds a subtle nutty roasting flavor to the porridge.

Prep the Chicken


Pour about 4 to 6 cups of water in the IP and push sauté high mode. Wait for 6 minutes or until the water boils, add the chicken breast for one quick minute. At this point, we are only cleaning the chicken to reduce excess fat and the foul odor. Press cancel or turn the pot off. Drain the water.

Leave the chicken in the pot and add 6 fresh cups of water or chicken broth. The chicken broth will help enhance the flavor of your porridge. However, if you don’t have chicken broth, water will do. Also remember, if you use mostly chicken broth, reduce the fish sauce or salt seasoning. The chicken broth may have seasoning of its own. You can add less seasoning and slowly add as needed to taste.

ip pressure cooker time chart
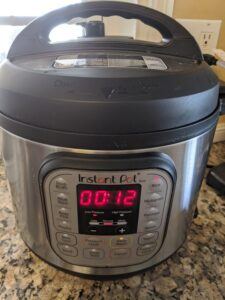
Press pressure-cook. If you are using 1 to 2 pounds of chicken, adjust the cooking time to 7 minutes.

The time depends on the weight of the chicken. Check the IP pressure cooker time chart. In my case, I have 1 lb. 2 oz. chicken so I put the timer for 7 minutes. It will take around 2½ minutes for the IP to pressurize and then cook for 7 minutes. When you are cooking on a regular stove, it will take about 30 to 40 minutes to make the porridge broth.


Prep the other Ingredients

While the IP is going, clean the cilantro, onion, and ginger. Dice the onion or leave it whole. I usually leave it whole so I can scoop it out when the porridge is done. I mostly want the onion flavor. You can leave it in if you like the onion texture. By the time the porridge is completed, the onion will be very mushy. Cut the cilantro into small pieces. Sliced one to two slices of ginger. Remember to remove the skin. You can add more ginger if you like. I prefer just a scent of ginger flavor. Quarter the lemon.ginger

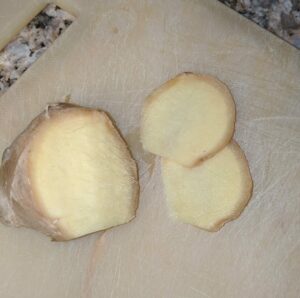
Once the IP pressure-cooking is done, open the valve to depressurize. It takes about 2 minutes. I usually cover the valve with a towel that you do not mind getting wet or dirty. The steam and water may spatter everywhere. Once the IP is depressurized, you can now open the lid.

Add rice, onion, ginger, and pepper to the chicken. Close the lid. Now press the porridge button. Adjust the timer to cook for 15 minutes. When using a cooking stove, it will take at least 60 minutes before the porridge is the right consistency.

Adding Flavors

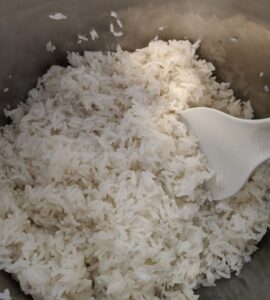
Once the time is up, I leave the IP to depressurize naturally for 15 to 17 minutes or manually depressurize the IP. Press cancel when the lid can be opened. Check for the porridge consistency. It should not be too thick where the spoon gets stuck moving around. It will be like soup. Press sauté and have it at low mode. herbs-lemon

At this point, you should be able to use a spoon and a fork or chopsticks to shred the cooked chicken breasts inside the pot. It should fall apart pretty easily. Add fish sauce or soy sauce and salt. If you do not have either fish sauce or soy sauce, you can try salt only. Add 1 teaspoon first. If it is not salty enough add another teaspoon and so on. I would not add all 2 tablespoons of salt at the same time. It may end up too salty and you will have a hard time fixing it.

Add sugar and pepper. Instead of MSG, we use sugar. It is a great flavor enhancer to compliment the salt. Mix well for another minute or two. This will help thicken the broth. The longer you cook the thicker the porridge. Make it to the consistency that you prefer. Turn off the IP and get ready to serve.

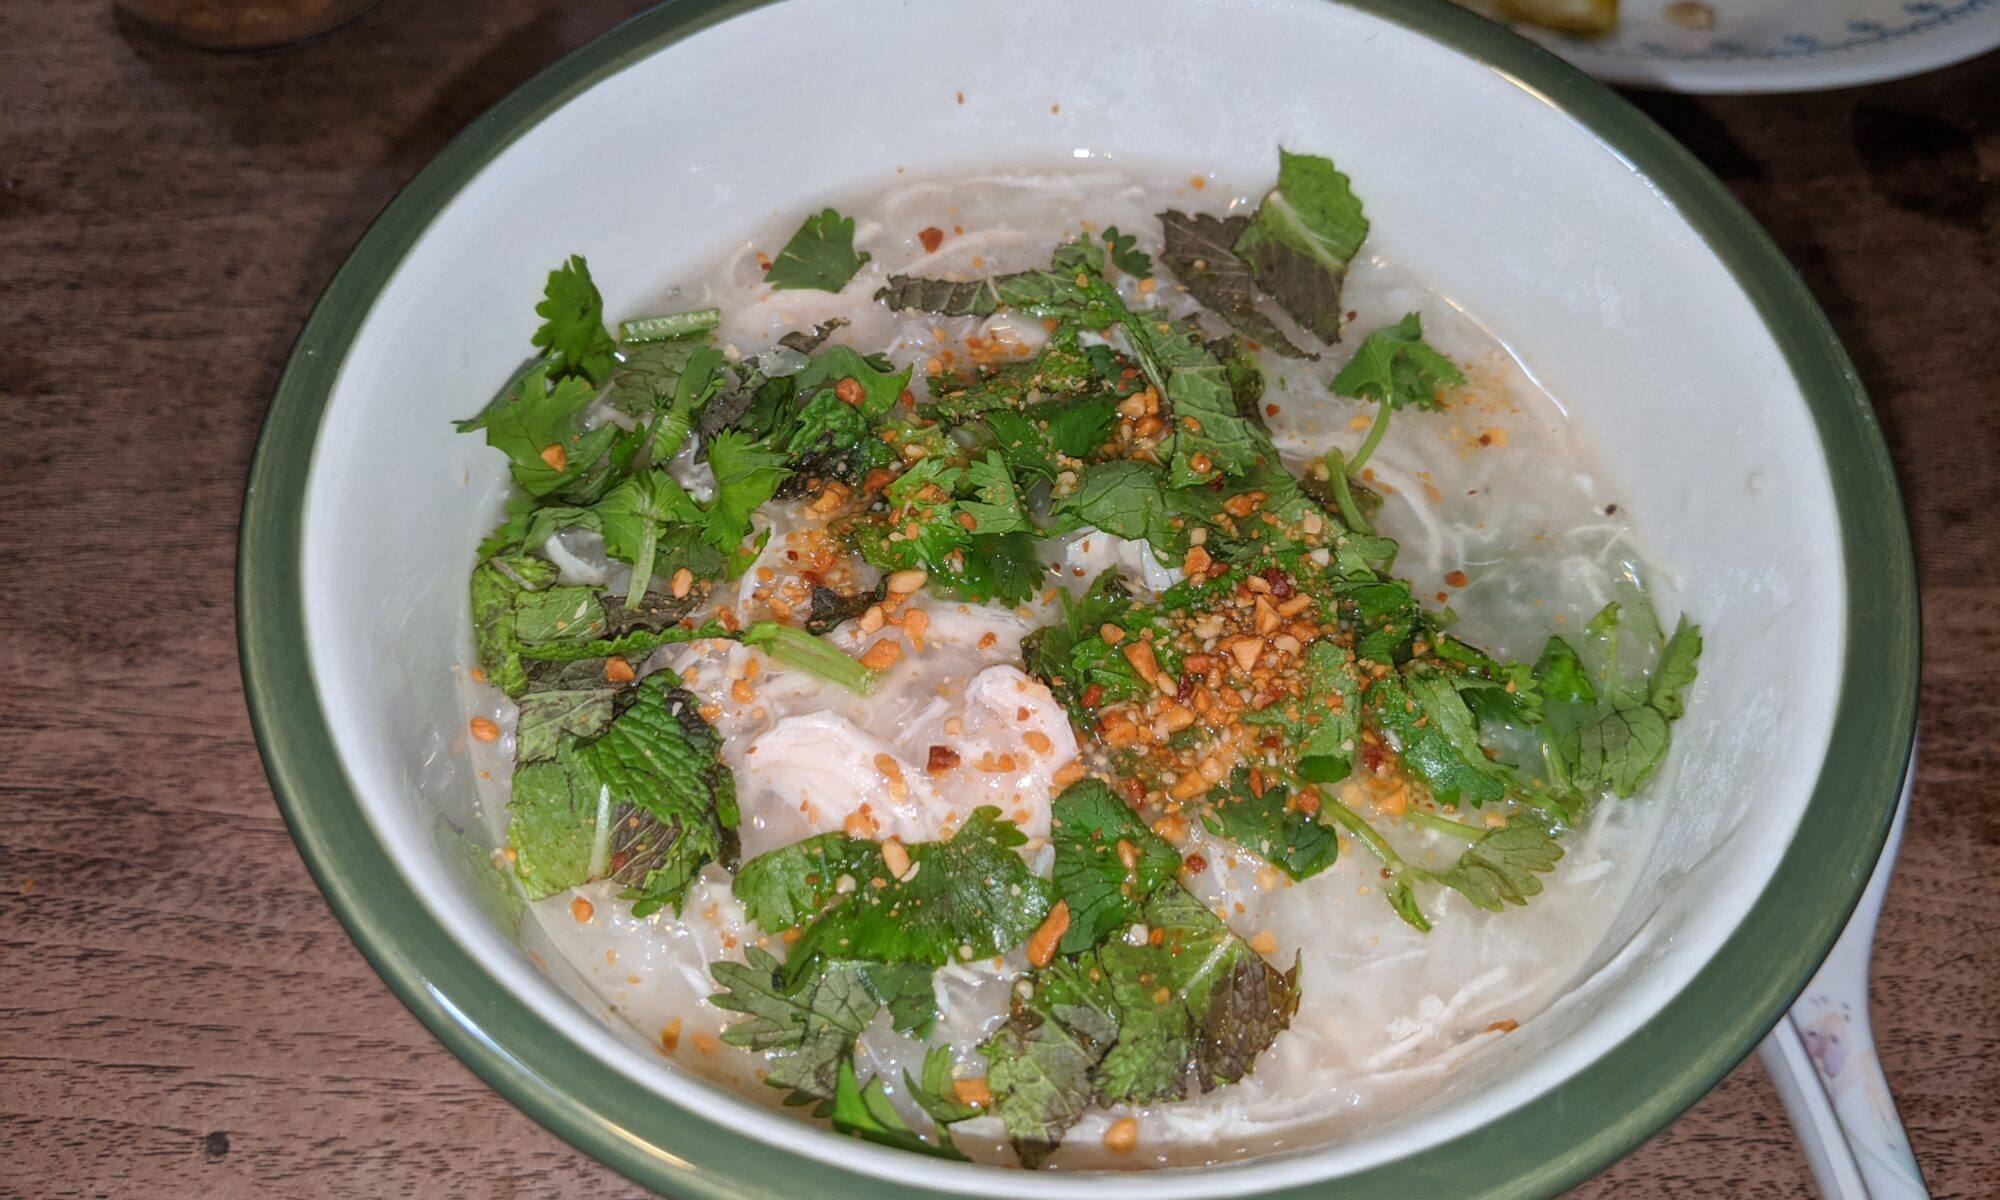
When served, you can add cilantro and bean sprouts. Squirt in the lemon juice and sprinkle over the porridge with ground roasted peanuts. Soothe your throbbing and scratchy throat or warm yourself with a pleasant bowl of porridge on a cool drizzly morning!!!

Conclusion

With Vietnamese chicken rice porridge, you can make it simple with the four basic ingredients or you can go all out with pork including organs such as intestines, liver, blood cubes, stomach lining, etc. Sounds yummy, doesn’t it. That is a special authentic treat for Vietnamese. Here is a YouTube video of how to make Vietnamese Chao Long:

I have not tried this recipe yet. I found it to share so that you can see the differences. I personally prefer simple chicken porridge.

You can also download this recipe –> Vietnamese Chicken Porridge chao ga

I love to hear your experiences with chicken rice porridge, whether you have never made them before or you are a pro at it, please leave me your thoughts below.

How To Make Rice With Instant Pot

clean-rice

Generally, rice is a Vietnamese stable. Therefore, most Vietnamese households have a rice cooker. My own dependable rice cooker has been working for me at least twenty (20) years. However, it has been acting up a little lately so I thought I should research and find myself another one just in case.

I found rave reviews on Instant Pot DUO with 7 in 1 appliance which includes making rice. Another point that won me over was the stainless steel inner pot. Initially, my first intuition was if an appliance is multi-purpose it may not be excellent solely with making rice. However, I was curious and I wanted to try something else other than Teflon coated inner pot so I decided to invest in one.

Now that I have an Instant Pot, I find my intuition is correct. The Instant Pot makes mediocre rice. It is not as easy and straightforward as the standalone rice cooker. It does not yield the same results. The rice appears to be denser and stickier. Whereas, the rice from a standalone rice cooker is light and fluffy. It also took me a few tries with trial and error before I have the correct amount of water so the rice is not too wet or gooey.

As the owner of this website, I tracked down special deals
for some products or services mentioned herein. As an Amazon Associate, I earn from qualifying purchases. When you use the link from this page to make a purchase, I may receive a small commission, and you may receive a great bargain – Full Disclosure.


Here is my recipe on how to make rice with an Instant Pot so that you don’t have to go through a bunch of trials and errors before you have a good consistency with your rice.

Ingredients

The ingredients are simple: rice and water. The rice that I prefer to use is jasmine rice. However, it is your choice of brand and the type of rice that you are familiar with. The amount of water will vary with the type of brand as well as the type of rice you choose.

The common rice sizes are 5 lbs, 25 lbs, or 50 lbs. I usually buy myself a 25 lb of rice from an Asian grocery store.  It is much cheaper. I store it in a container. You want to keep it dry and covered. Humidity will bring bugs.

I included coconut water as optional. It is a little bit more exotic and tastier. I have not tried coconut water in the Instant Pot before. I am sure it will be similar to the standalone rice cooker.  You can give it a try if looking for something different.

For Jasmine rice that I have been using so far, it is a one-to-one ratio of water and rice. If you cook one cup of rice then use one cup of water. I also notice that if you are using a 6-quart Instant Pot two (2) cups of rice or more works best. Otherwise, there will be a chance that your rice will burn or stick to the pan with too little amount of rice. You can get away with less rice in the smaller size 3-quart Instant Pot.

For my family of four, I use two cups of rice and two cups of water. You can use that amount to gauge for you and your family.


Clean the Rice

First and foremost make sure to rinse the rice. Sometimes, I found pebbles, rice bugs, and other possible dirt in the rice. You never know how long the bags of Jasmine rice sit in an Asian grocery store before it is sold to you. I do sometimes find bugs in them and they do multiply pretty quickly. Even though the bugs are harmless, it is good to know.

rinse-rice

I do not want to alarm you. It is rare to find bugs but it is something you might want to be aware of.

I usually clean the rice until the water is clear instead of opaque. We are also cleaning the starch from the rice. Once the rice is rinsed, I drain as much water as possible from the rice. I add new water. If you use two cups of rice, add two cups of water. It does not matter if it is hot or cold. clean-rice

Cook the Rice

Once the rice is rinsed and clean, I wipe the bottom of my pot and place it in the Instant Pot cooker. Remember to plug in the cord. Make sure the lid is properly closed and secure. Also, check to make sure to have the steam valve at the close. If the valve is open, the rice will burn and stick to the bottom of the pan. I cooked it with the valve open before just to see. Also, you can start cooking with the lid open for other cooking functions such as sauté so always make sure your lid is closed before you press the rice button.

cooking-rice

It will take about 15 minutes to cook the rice. It takes several minutes for the pot to calculate after you press the rice button. The word AUTO will appear. After the calculation is completed, the timer “00:12” minutes will pop-up and count down.

Once the cooking is complete, the cooker will beep several times. At this time, you will have a hard time opening the lid because of the pressure. You can do one of the two things:

  1. Allow the pressure to depressurize naturally and do nothing. OR
  2. Open the release value to allow the steam to dissipate. Turn the release valve to Venting. Be careful, do not put your hand on top of the vent. The steam is coming straight out and it is very hot. You can get burn. Use your fingers pushing on the side or use a kitchen mitten.

There is the silver round metal looking thing. If it is up then that means there is pressure, you will not be able to open the lid. If the silver round metal is down, the pressure is gone. You can open the lid safely.

It will take about 15 minutes for the lid to depressurize naturally. After the rice is done cooking, the pot will automatically change to keep warm and a new timer will appear starting at L00:00. This is a nice feature because you can tell how long your food is being kept warm in the pot. However, I would not recommend leaving your rice in the cooker longer than an hour. The rice will burn and stick to the pot. It will be a challenge to clean.


Conclusion

cooked riceYes, the Instant Pot does make rice. The rice turns out mediocre in comparison to the standalone rice cooker. I noticed that there was a lot of water condense under the lid causing the rice to be wet and dense. However, Instant Pot is great at pressure cooking. If you are not familiar with Instant Pot and would like to learn more, click on my Instant Pot Review => Instant Pot Review – Can It Make Good Rice.

In my opinion, if you are picky like me and use it every day, look into a standalone rice cooker. Otherwise, if you do not make rice every day and not picky, you do not need to invest in another appliance to clutter your kitchen counter. An Instant Pot would be perfect for your occasional rice consumption.

Thank you for visiting me. I love to hear your thoughts and experiences with making rice using the Instant Pot and/or other rice cookers. Please leave your comments below.

How To Make Tofu From Soybeans – Three simple ingredients

home made tofu block

Tofu is a bean curd that is made from three main ingredients: soybeans, water, and a coagulant. A coagulant is an acidic substance such as lemon juice or vinegar. The coagulating soy milk creates a curdling effect and lumps together into curds. The curd then is pressed and drained in a mold to produce the final product which is tofu. block

Tofu is often used in vegetarian cuisines to substitute meat. By itself, the taste blends in flavor. When use with other fresh ingredients such as tomatoes, onion, mushrooms, etc, it adopts and absorbs their neighbors’ flavors. It is light and become flavorful by its surrounding environment leaving you light and sated feeling in your tummy. You can also add meat to enhances the flavor.

In this article, we will learn how to make tofu from soybeans with three simple ingredients. This recipe is borrowed from www.Instructables.com. I found this recipe to be simple and straight forward. I will be adding my comments along with the existing recipe based on my experience.

As the owner of this website, I tracked down special deals for some products or services mentioned herein. As an Amazon Associate, I earn from qualifying purchases. When you use the link from this page to make a purchase, I may receive a small commission, and you may receive a great bargain – Full Disclosure.

Ingredients

3 cups (1lb) dry soybeans, Hunza Organic Soybeans (2 lbs)

water

Choose ONE from the list of coagulants below:

Equipment:

Food processor or blender

2 large pots

1 strainer

a mesh bag or cheesecloth

1 colander or a tofu mold

Soak and Blend

soaked soybeans

Soak the soybeans overnight. Make sure it is a big bowl because the tofu will expand. Rinse the soaked beans and discard any discolored ones and drain the water.

Pour the soybean into a blender or a food processor. You may not be able to pour all the soybeans into the blender at once. It is best to divide them into several batches. Some blenders may not handle too many soybeans at one time.

blended-tofu

Fill the blender with enough water to cover the beans. Process the beans for a few minutes in the blender or until the beans are thoroughly ground.


Making Soy Milk

Add the processed beans to your largest pot with 12 cups of water. Stir frequently to prevent the milk from scorching the bottom and simmer for about 20 minutes under medium to low heat. This may foam up a bit so be careful not to let it boil over. If the foam boils over, lower your heat.

After 20 minutes, strain the cooked processed beans into your second pot. Use a spoon to press out as much of the milk as you can. You can use a cheesecloth to squeeze out the excess liquid as well for a quicker result. The liquid is soy milk. The solids are okara.

okara and soymilk
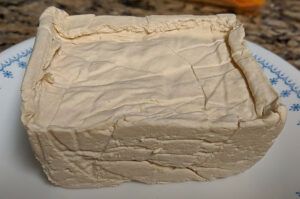
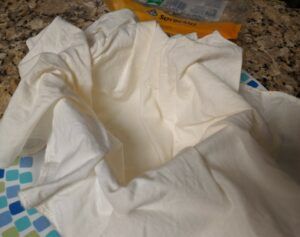
If enjoy soy milk, pour out one to two cups of soy milk for your consumption at this point and continue with the rest to make tofu. Add sugar, honey, or any of your sugar substitute if desire to your soy milk. Drink it fresh and warm or refrigerate and have it cold.

soymilk

The okara is full of nutritional value containing soluble and non-soluble fiber, protein, calcium, and other minerals. It seems like a waste to throw away. Here is a great article that talks more about okara along with recipes using okara –> https://justhungry.com/2006/04/milking_the_soy.html. You can dehydrate okara and freeze it for later use. When I have too much okara, I use it as compost for my garden.

Making Tofu

Heat the soy milk back up to around 180 F degrees (depending on your stove it may take from 5 to 15 minutes). In a separate bowl, dissolve your choice of coagulant (Epsom Salt, lemon juice, vinegar, gypsum or nigari) in 1½ cups of warm water.

straining tofu

Remove the soy milk from heat and gently stir in the coagulant. Start with a small amount and then increase as needed at 180 F degrees. In about 5 to 10 minutes the curds will separate. If it takes a little longer, you can add a little more coagulant until the liquid becomes clear and less milky. Be careful not to add too much because the tofu maybe come bitter. I used vinegar as my coagulant so the flavor is slightly sour.

tofu-mold

Line your colander or mold with a mesh bag or cloth. Skim out curds and pour into mold. Wrap the remaining cloth on top of the tofu and even it out with a hard flat object such as a flat plate.

The mold I used look like above. Make sure to wet the cloth so it will help with smoother surface and less creases in your tofu. The picture of my homemade tofu has a lot of creases because I didn’t wet my cloth to make it straight.

Place a heavy object on top of the plate. This help squeezes and drains as much water as possible from the tofu. Less water and more setting time create firmer tofu. Leave for about 20 to 30 minutes or longer for a firmer result.


Conclusion

Making tofu is a simple process. However, if it is your first time, the process may take a little longer since you do not know what to expect. It gets easier through experience. The coagulant Nagari and gypsum are not as easy to come by. You will need to order them online like Amazon.com or visit an Asian grocery store.

The texture and taste may vary depending on the coagulant that you use. I have not tested all the different coagulant yet. I have tried gypsum before and does not require a lot of gypsum powder before the curds coagulate. Gypsum is calcium sulfate. Make sure it is food grade. It yields mild-tasting and slight sweetness to the tofu in comparison to nigari. It also adds calcium to the tofu. You can find it at home brewing supplies, online, or Chinese stores.

From my research of nigari, it consists mostly of magnesium chloride also called bittern. Nigari creates smoother texture tofu. Nigari is a mineral salt residue when the table salt is extracted from seawater and comes in liquid or powder form. It is a traditional Japanese ingredient used to make tofu.

Epsom salt is another good alternative. It produces a little grainier texture than gypsum. You can find Epsom salts easily at your nearest local drugstore or Walmart.

The easiest of all coagulants to find are vinegar and lemon juice. However, they produce grainier texture and a little sour flavor to the tofu.

Click here for an article with more FAQs on coagulants –> Tofu coagulant guide: what to buy and where to find it.

If you enjoy cooking, it is a pretty fun experiment like chemistry on food reactions. From this recipe, we produce three products: soy milk, tofu, and okara.

The soy milk itself is refreshing. However, the version I made tastes leafy green and organic to me. Perhaps, I did not add enough sugar or honey. To be honest, I do not like it too much. The tofu is a little sour because I used vinegar as my coagulant. I am saving my okara to test the recipes I found online to see if it enhances the flavor of the food I make.

I am dehydrating the okara using the oven and then freeze it for longer self-life. It is a lengthy and smelly process. My kids complain about the smell. It smells like dirty laundry. Worst-case scenario, I can use it as compost for my garden.

I hope this article has been helpful to you. I love to hear about your experiences, successes, failures, and/or questions. Please leave your comments below.


Vietnamese Mung Bean Dessert – Banh Dau Xanh Recipe

banh dau xanh

mung bean cake
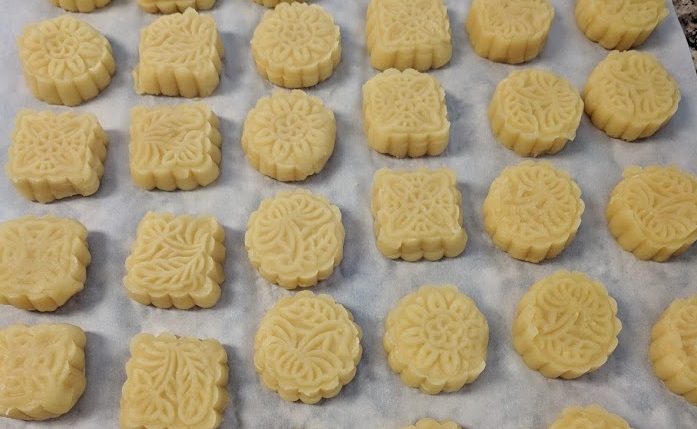
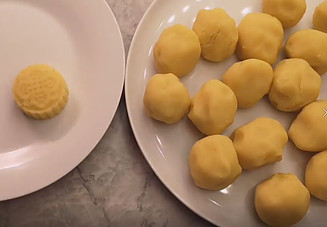
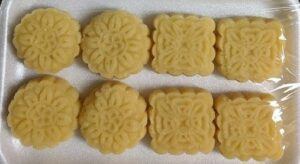
In this article, we will be showing how to make a Vietnamese Mung Bean Dessert called “Bánh Đậu Xanh”. They are available primarily during the Vietnamese holidays. “Bánh Đậu Xanh” is also known as mung bean cakes. You can find them in Asian stores during Tết New Year or Harvest Moon Celebration.

I extracted the recipe from a video on YouTube.com created by Văn Phi Thông. The video is in Vietnamese. I translated and converted the recipe content into English. The recipe is simple and the final product turns out delicious. The procedure is straight forward. The most difficult operation is cooking the beans. There are five main and 1 optional ingredients. They are gluten free and dairy free.

This recipe was created solely for my demonstrations. The Mung Beans Cakes turned out perfectly each time when I made them. I decided to make this recipe available online to share with others. I hope you find it useful and tasty.

As the owner of this website, I tracked down special deals for some products or services mentioned herein. As an Amazon Associate, I earn from qualifying purchases. When you use the link from this page to make a purchase, I may receive a small commission, and you may receive a great bargain – Full Disclosure.

Ingredients

  • 2 cups (400 g) sugar
  • 2 tablespoons (50 g) vegetable oil
  • 1 teaspoon Salt
  • (optional) 1 teaspoon vanilla or 1 vanilla powder packet

Clean the mung beans thoroughly until the water is nice and clear.  Soak them for at least 4 to 5 hours or overnight. If you are in a hurry then use warm water to soak for 2 to 3 hours. Warm water speed up the soaking process. After soaked for the allotted time, clean the mung beans once again. Place the mung bean in a colander or a strainer and drain the water.drained mung beans

Cook the Beans

  • Place the drained mung beans in a large pan. Add 1 teaspoon of salt. Add water until the water covers two to three inches over the mung beans. You can use the knuckle of your fingers as a measuring device, the water covers one to two knuckles would be sufficient. I often measure with my fingers. I think it is an Asian thing.
  • Cook the mung beans using medium high heat. Cover until water boil. Keep cooking until the white foam covers the entire surface. foam water
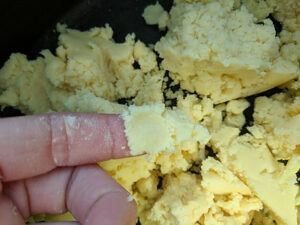
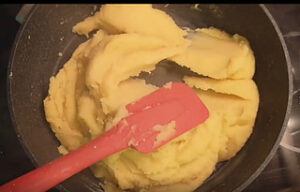
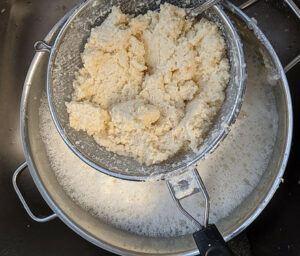
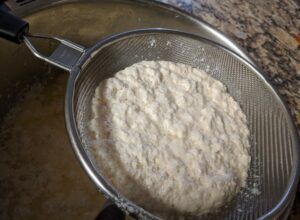
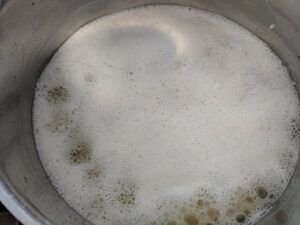
Then we pour out all the foam. Pour out most of the water and leave very little water left. How much is little? It is a judgment call on your part. We don’t want to see the water. The only time you would see the water is when you lean the pan over to one side. You could then see the water. The intention is for the mung beans to be cooked just right, not too dry then it’ll be flaky and not too wet then it’ll be mushy.
  • Cook under low heat with cover, if the heat level is from 0 – 10, use about 2. Cook for 12 – 15 minutes. After 12 minutes, open the cover and check to see if the mung beans are done. When the mung beans are very soft to touch then they are done. They should not clump together or be burnt at the bottom.  We avoid too wet and mushy. This cooked mung beans are great fillings for many other Vietnamese cakes.


Process the Beans

  • Wait until the mung beans are completely cool before we put it into a blender. The hot temperature is not good for blender. It may blunt the blades. Split the mung beans into 2 to 3 batches to process the beans. We want the beans to be really fine so it will melt in your mouth with no clumpy texture.

processed mung beans

Frying the Beans

  • Once processed, put all the mung beans in a large frying pan. Add 2 cups sugar and ¼ cup coconut. Mix well while the pan is on medium high heat. The hardest is cooking the mung beans and achieving the balance so they are not dry or too wet. Bring mixture to boil then turn the heat down to medium. Taste the mung beans to see if they are sweet enough. Add sprinkle of salt to enhance the flavor of sweetness. Mix well. frying mungbeans

  • Make sure the beans folded well together. They’ll become less sticky. If you feel the beans are too sweet you can add less sugar next time, perhaps 1-3/4 cups instead. Traditionally, the mung bean cakes are sweet. The sugar also acts as a preservative to keep the cakes last longer without refrigeration.
  • Add oil once the mixture becomes dryer and less sticky. If prefer, you can add optional vanilla flavor – 1 packet or liquid vanilla. Mix well.
  • The consistency will get heavier and harder to mix. You can form it into a large dough. Remove pan from heat.

Forming the Dough

  • Pinch a piece from the dough and form it into 60 gram balls or to the size of your mold. Place the ball in the moon cake mold. Press and form the dough into shape. Do it quickly while the dough is still warm. We don’t want the dough to cool then it’ll be harder to form and become flaky.  forming doughforming cake

Conclusion

This batch should yield approximately 20 cakes varying to the size of your molds. Please Keep in mind, you can adjust the amount of sweetness of the cakes. Traditionally, the cakes are sweet. The recipe calls for 2 cups of sugar. You can use 50 grams or up to 1/2 cups less sugar if you prefer less sweet. If your mixture has less sugar, the cakes will not preserve as long at room temperature. Eat within one week or less. Otherwise, the mung bean flavor and fragrance will dissolve and leave behind an oily flavor and taste. Keep the mung beans refrigerated to keep them last longer.

banh dau xanh

The cakes serve well with hot tea. If there are any questions, please feel free to leave me a comment below. I would love to hear how the recipe works out for you. Enjoy!


Cafe Sua Da Recipe – Vietnamese Iced Milk Coffee

Vietnamese coffee filter

This is an ironic situation. I am not a coffee drinker. I grew up drinking diluted coffee with sweet condensed milk and lots of water. My mom occasionally made this for me and my siblings for breakfast. I can safely call it condensed milk with coffee-flavored water. We dipped our baguette into the coffee drink and enjoyed the sweet flavor of milk and the bitter aroma of roasted French coffee. This was a treat.

As I grew up, I really never liked the bitter taste of coffee so I did not drink it. I do enjoy the aroma every time I pass a coffee shop. If I have to drink coffee to keep me awake, I would usually add lots of cream and sugar to mask the bitterness of coffee.

I learned that Vietnamese Iced Milk Coffee or also known as Café Sửa Đá has been gaining popularity in the US by leap and bound. So here I am, I thought it would be good that I do my research, make it, and put a recipe together from an unbiased coffee perspective. Plus, Café Sửa Đá has plenty of sweetness from the condensed milk for me to try.

As the owner of this website, I tracked down special deals for some products or services mentioned herein. As an Amazon Associate, I earn from qualifying purchases. When you use the link from this page to make a purchase, I may receive a small commission, and you may receive a great bargain – Full Disclosure.

Vietnamese Coffee Filter – Phin

In order to make Vietnamese coffee, we will need a Vietnamese coffee filter or also known as Phin in Vietnamese. It’s a cute mechanism. I went out bought myself one from an Asian market. You can also make Vietnamese coffee with the French Press.

Vietnamese coffee filter

Originally, there are three different sizes: small, medium, and large.

The small is commonly seen in your average Vietnamese household which yields 6 oz of coffee. The medium size can be found at coffee shops that yield 8oz of coffee, and the large size is not as common which yields 11 oz of coffee the size of a coffee mug.

I just found on Amazon with a vendor that offers 5 different sizes: x-small (4 oz), Small (6 oz), Medium (8 oz), Large (11 oz), or X-Large (15 oz). CLICK Amazon Phin filter or the picture below to see MORE…

There are three components to a Phin:

  1. The coffee filter – This is where the coffee and hot water will be brewing and filtering through.
  2. the insert press – This is a screw-on press inserting on top of the coffee. Its job is to provide pressure, allow the hot water to bloom the coffee into the flavor, and slow down the drip of the coffee into the cup. The tighter the press than the slower the drip.
  3. the lid or cap – the lid traps the heat inside the filter chamber to help the coffee stay hot.

Coffee was introduced to Vietnam by the French so I assumed the Phin was also a French filter. I asked my French friend and he said that the Phin is a Vietnamese filter and not a French thing. Silly me. As I dug a little more, according to the Trung Nguyen coffee website, the Phin filter may originate from possibly Laos in the 1800s. It is not unique to only Vietnam. Other regions such as Laos, Cambodia, and Thailand also enjoy the simple stainless steel filter.


Coffee

I found two popular brands of Vietnamese coffee here in the US. The most popular brand is called Cafe Du Monde. The second brand is called Trung Nguyen. The Phin filter requires a medium-coarse grind coffee and both brands provide the right grind. Also, dark French roasted coffee is often used by the Vietnamese.

You can find both brands at your local Vietnamese market or on Amazon.com.

Did you know that Vietnam is the leading producer of coffee in Southeast Asia and the second-largest producer of coffee in the world next to Brazil? Because of the mountainous terrain, altitude, and climate, Vietnam offers half a dozen unique species and varieties of coffee. The terrain and climate of Vietnam are considered ideal for almost any species of coffee.

Ingredients

There are three main ingredients for Café Sửa Đá recipe:

  • 1 tablespoon medium-coarse ground coffee (French roasted, Cafe Du Monde, or Trung Nguyen)
  • 1 to 3 tablespoons condensed milk (depend on your sweetness of flavoring)
  • 1 tall glass of ice

Directions

Set your hot water for boiling. While the water is being heated, we can set up the coffee. Remove the coffee insert press from the Phin. Turn the insert counter-clockwise until the insert comes out freely. Depending on how strong you would like your coffee, add the ground coffee into the Phin. I would start with 1 tablespoon of coffee. If it is not strong enough, next time add a little bit more.

Make sure the remove insert presscoffee is spread out evenly inside the Phin. Place the insert back into Phin. This time tighten the insert clockwise with your hand until you can’t turn anymore. Then release the tightness of the insert with one counterclockwise. This process keeps the coffee in place to allow the coffee to drip into your cup at a slow pace.

Add 1 or 2 tablespoons of condensed milk to the glass or mug you will be using for the drip coffee. I usually add at least 2 tablespoons because I like it sweet. If you add 3 tablespoons, the coffee will taste more like caramel.

Once the water boils, remove it from the heat and allow it to cool for 30 seconds to a minute or until the water temperature at 185 to 195 degrees. While waiting for the water cooling down to the right temperature, place the coffee filter on top of a mug or a glass. Pour about 2 tablespoons of hot water into the filter. This will help moisten and swell the coffee to bring out its flavor.

cafe sua daWait for 20 seconds then fill the filter with hot water. Place the lid on top and wait for 3 to 4 minutes. According to the Trung Nguyen coffee website, the dripping process should finish within 4 minutes to achieve the best flavor.

If the water drip through too slow, then you may have your insert in too tight or make the coffee grind coarser. Loosen the insert a little bit. The medium-coarse grind should do well. If the water drip through too fast, then the insert may not be tight enough. You can either tighten the insert, add more coffee, or make the coffee grind finer.

Once the coffee finishes dripping, remove the filter from your cup. Mix the coffee and condensed milk. Fill a tall glass with ice. Remember, the more ice you have the less strong the coffee will be. Pour the mixed coffee into the glass of the ice. You now have a glass of delicious Cà Phê Sữa Ðá. Enjoy!

Here’s a video with details on how to brew Vietnamese coffee:

Conclusion

I learned how to make Café Sửa Đá along with fun interesting facts about coffee. The flavor reminds me of the coffee energy drink. However, I think this coffee may be better for me than the energy drink. I think it could grow on me if allow it to. I know it can be addicting so I’ll have to drink it in moderation. Right now I am going to stick to my boba smoothies or tea.

If you stumble across questions or comments about coffee, I love to hear it. Please leave your comments below.