Pho Beef Noodle Soup – Instant Pot Homemade Recipe

pho bo

Pho beef noodle soup is one of the most popular Vietnamese dishes. It is also one of my family’s favorite noodle soups. Knowing our weakness, my parents bribed all the children including myself with an unlimited amount of Phở once arrived in America with a condition that we promise to behave and cooperate during the escape in 1978. It worked. As children, we did not know any better until much later. All we understood was unlimited “Phở”. YUM!!!

What is Phở Bò?

Phở is a rice noodle soup with seasoned and flavorful clear broth. It reminds me of chicken noodle soup but instead of chicken, it is beef. Even though they are both comfort food, the flavor is not the same.

When you think of beef broth, you would automatically think of stew, dark broth, heavy, and meaty. Quite the contrary, the broth is clear, light, and flavorful.

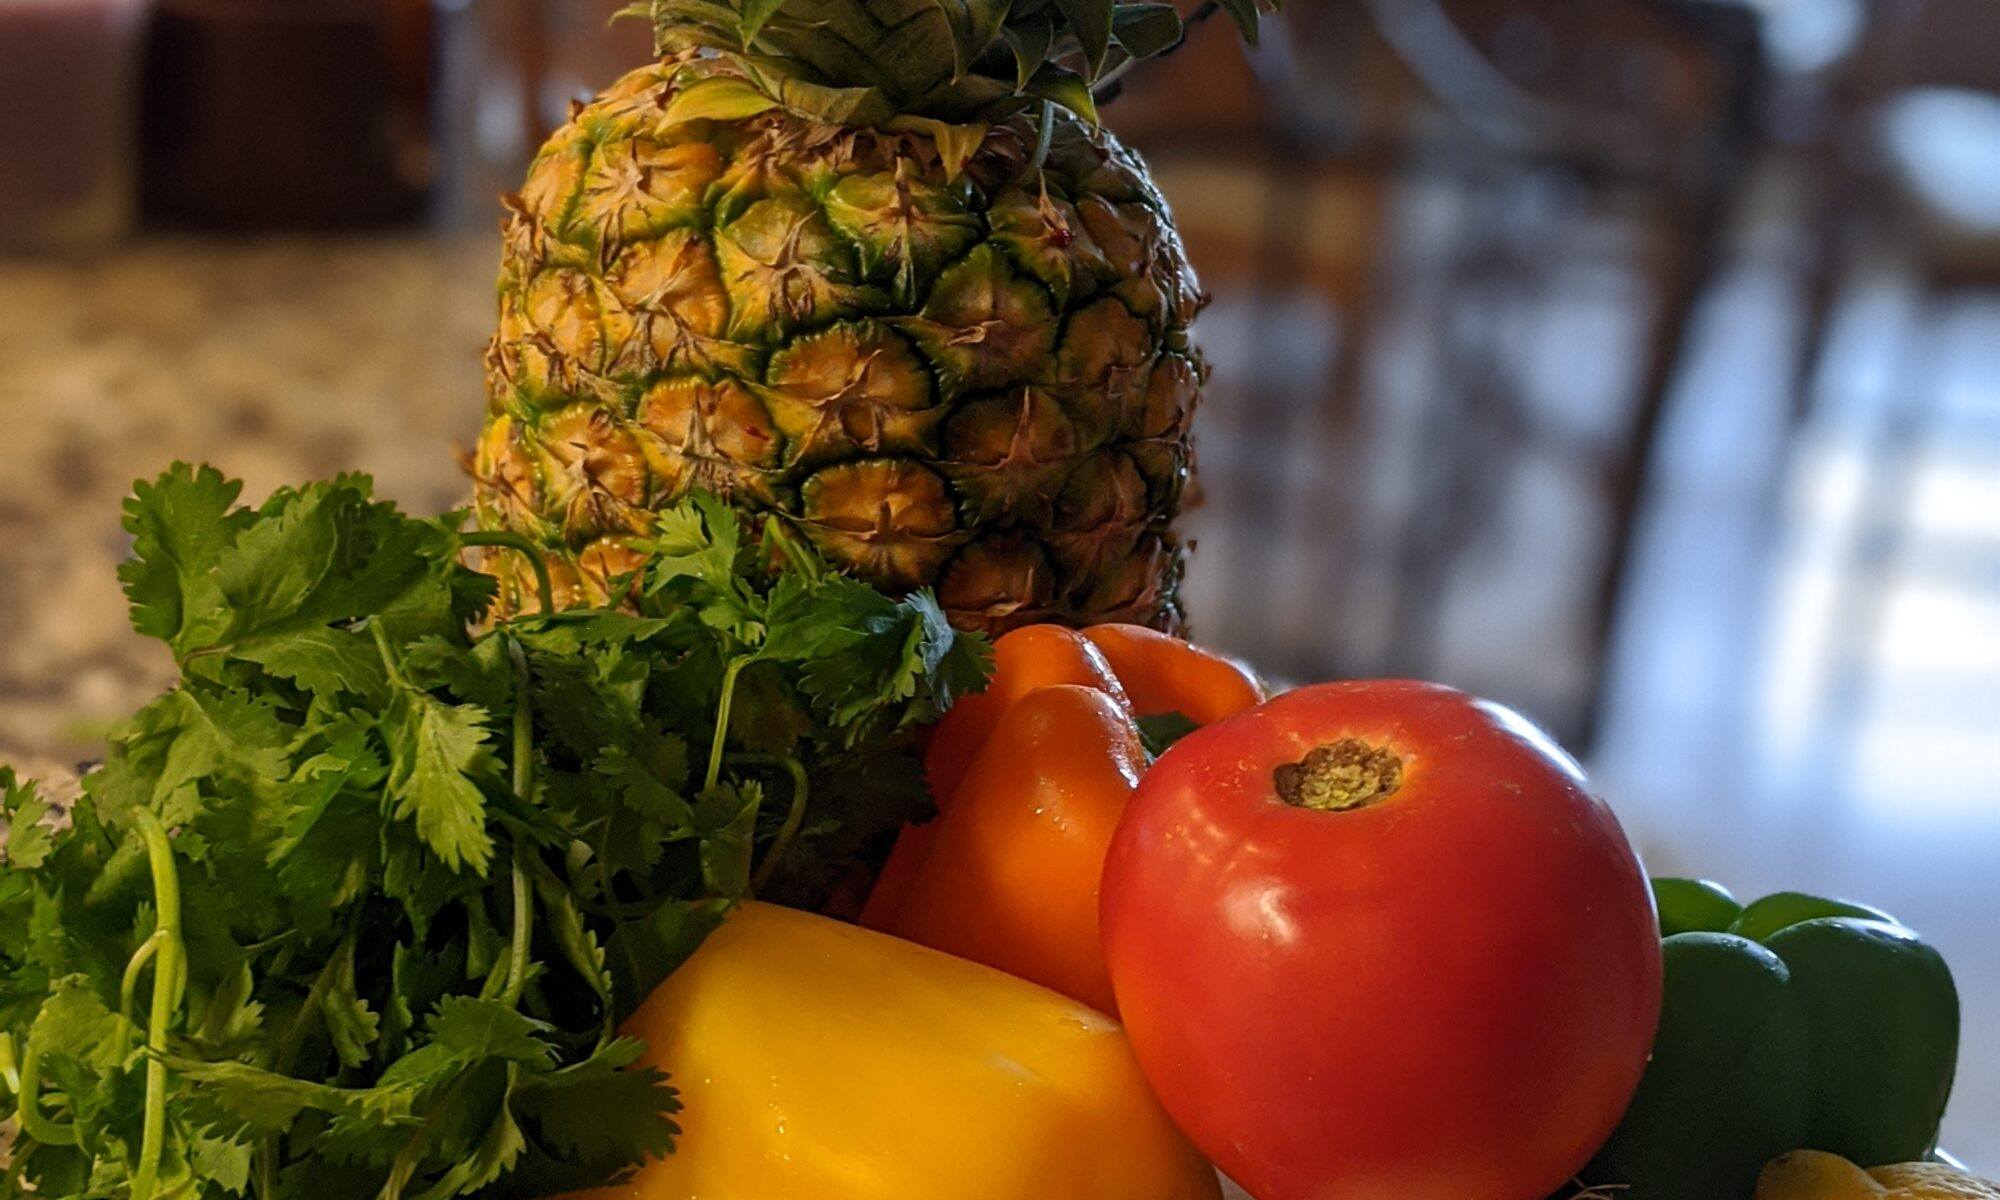
Most Vietnamese eat Phở for breakfast, however, it is also good for lunch, dinner, or midnight snacks. Phở is composed of rice noodles and thinly sliced beef soaked in beef broth. It is served with mint leaves, Thai basil, bean sprouts, Dragon or Monkey sauce, lemon, and optional hot chili peppers. Make sure to read this recipe at least once before you start.

As the owner of this website, I tracked down special deals for some products or services mentioned herein. As an Amazon Associate, I earn from qualifying purchases. When you use the link from this page to make a purchase, I may receive a small commission to support this website, and you may receive a great bargain – Full Disclosure.

Ingredients

  • 3 to 5 pounds oxtail, chopped into 1 to 2 inch long pieces and/or beef bones
  • 1-inch ginger root
  • 1 medium regular onion
  • 4 cubes Phở beef flavor bouillon or 2 to 3 tbsp Beef Flavored “Phở” Soup Base (adjust to taste)
    OR
  • 1 bag Gia Vị Nấu Phở ( Phở flavor spice)
  • 1 teaspoon sugar
  • 1 teaspoon salt
  • 1 (16-ounce) package, bánh phở, oriental style noodles, cooked (fresh or dry)
  • 1 pound beef sirloin, thin slices
  • 1 lemon, cut into 4 wedges
  • 1 cup finely chopped green onion
  • 1 cup finely chopped cilantro
  • 1 pound beansprouts
  • 1 cup finely chopped Thai basil
  • 1 bunch of basil mint leaves
  • red pepper, chili, or pepper sauce (optional)
  • Phở Queen’s Monkey or Dragon sauce (optional)

Making the Broth

For the “Phở” broth you can also substitute beef with chicken or veggie. However, the traditional broth is beef broth. Making the broth is the longest process.

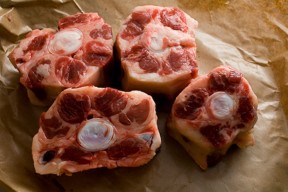
Clean and drain meats and vegetables. Oxtail is not often used in restaurants because it is pretty expensive per pound so it is not as cost-effective. They often use beef bones. That is ok too but oxtail yields additional flavors. Fill a gallon-sized saucepan with enough water to blanket the bones. Bring the water to a boil. Place the oxtail and/or beef bones in the saucepan. Allow simmering for 1 to 2 minutes. Remove the saucepan from the heat. Drain. Boiling the oxtail and /or beef bones helps clean the meat thoroughly, clear the leftover blood and smell, and reduce the excess fat.

In the same saucepan, add 16 cups of water to the oxtail. Bring to a boil at high heat. While waiting for the water to boil, prepare the vegetables, and cut the ginger and onion into halves. Place the ginger and onion on a stove range. Roast to a crisp on the open flame or burner.  You can also pan-roasted ginger and onion or use the mode Sauté in the Instant Pot.

Wash and drain the ginger and onion halves. Slice the ginger into thin slices. Leave the onion in two halves. Drop the onion and ginger slices into the broth. Once boiling, reduce the heat to medium-low. Cover and simmer for at least 60  to 120 minutes.

If you are using an Instant Pot, you can add 4 to 6 cups of water to the pot. It depends on how many bones you are cooking. You can fill the water to the maximum mark. Close the lid and push the pressure cook for 30 minutes.

At this time and before I add any flavorings, I like to remove some of the large beef bones for my dog to chew on. Warning, do not give your dog the bones or meat with all the seasoning such as cinnamon, anise, and cloves. The flavor could be overpowering and the dogs may throw up.

After the first 30 minutes in the Instant Pot, you can allow the air to release. Then add the seasoning.

Add the Phở cubes or beef flavored “Phở” soup base, 1 bag Gia Vị Nấu Phở, sugar, and salt to the broth. Beef flavored “Phở” soup base has no msg. It also included the Phở flavored spice pouch in the container. Cook for an additional 40 minutes on a stovetop or another 20 minutes with an Instant Pot.

Taste the broth and adjust with additional salt if necessary. Remove the oxtail pieces/beef bones, Gia Vị Nấu Phở bag, and onion. Keep only the broth. Reduce the heat to low. Skim any fat layer on top of the broth.

Slicing the Beef

The traditional beef is brisket because it has mixed in fat, tendon, and skin. However, I use sirloin steak such as beef top round. I like less fat and tendon.beef top round

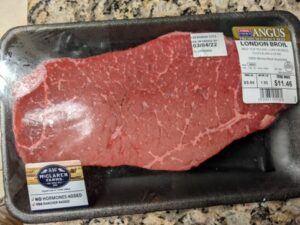
While the broth is simmering, slice the beef into thin slices.
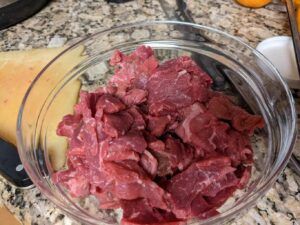
 sliced beef

Making the Noodles

Boil the rice noodles. Follow the instructions on the noodle bag. I usually fill a saucepan with water and bring it to a boil. Pour in the noodles (as much as needed.) I usually make four bowls with one bag of 16 oz noodles.

If I use fresh rice noodles, I cook the noodles for 5 to 7 minutes. If I use the dry noodles, I cook for about 7 to 10 minutes. We do not want to overcook the noodles. The overcooked noodles lose their elasticity and also become mushy.
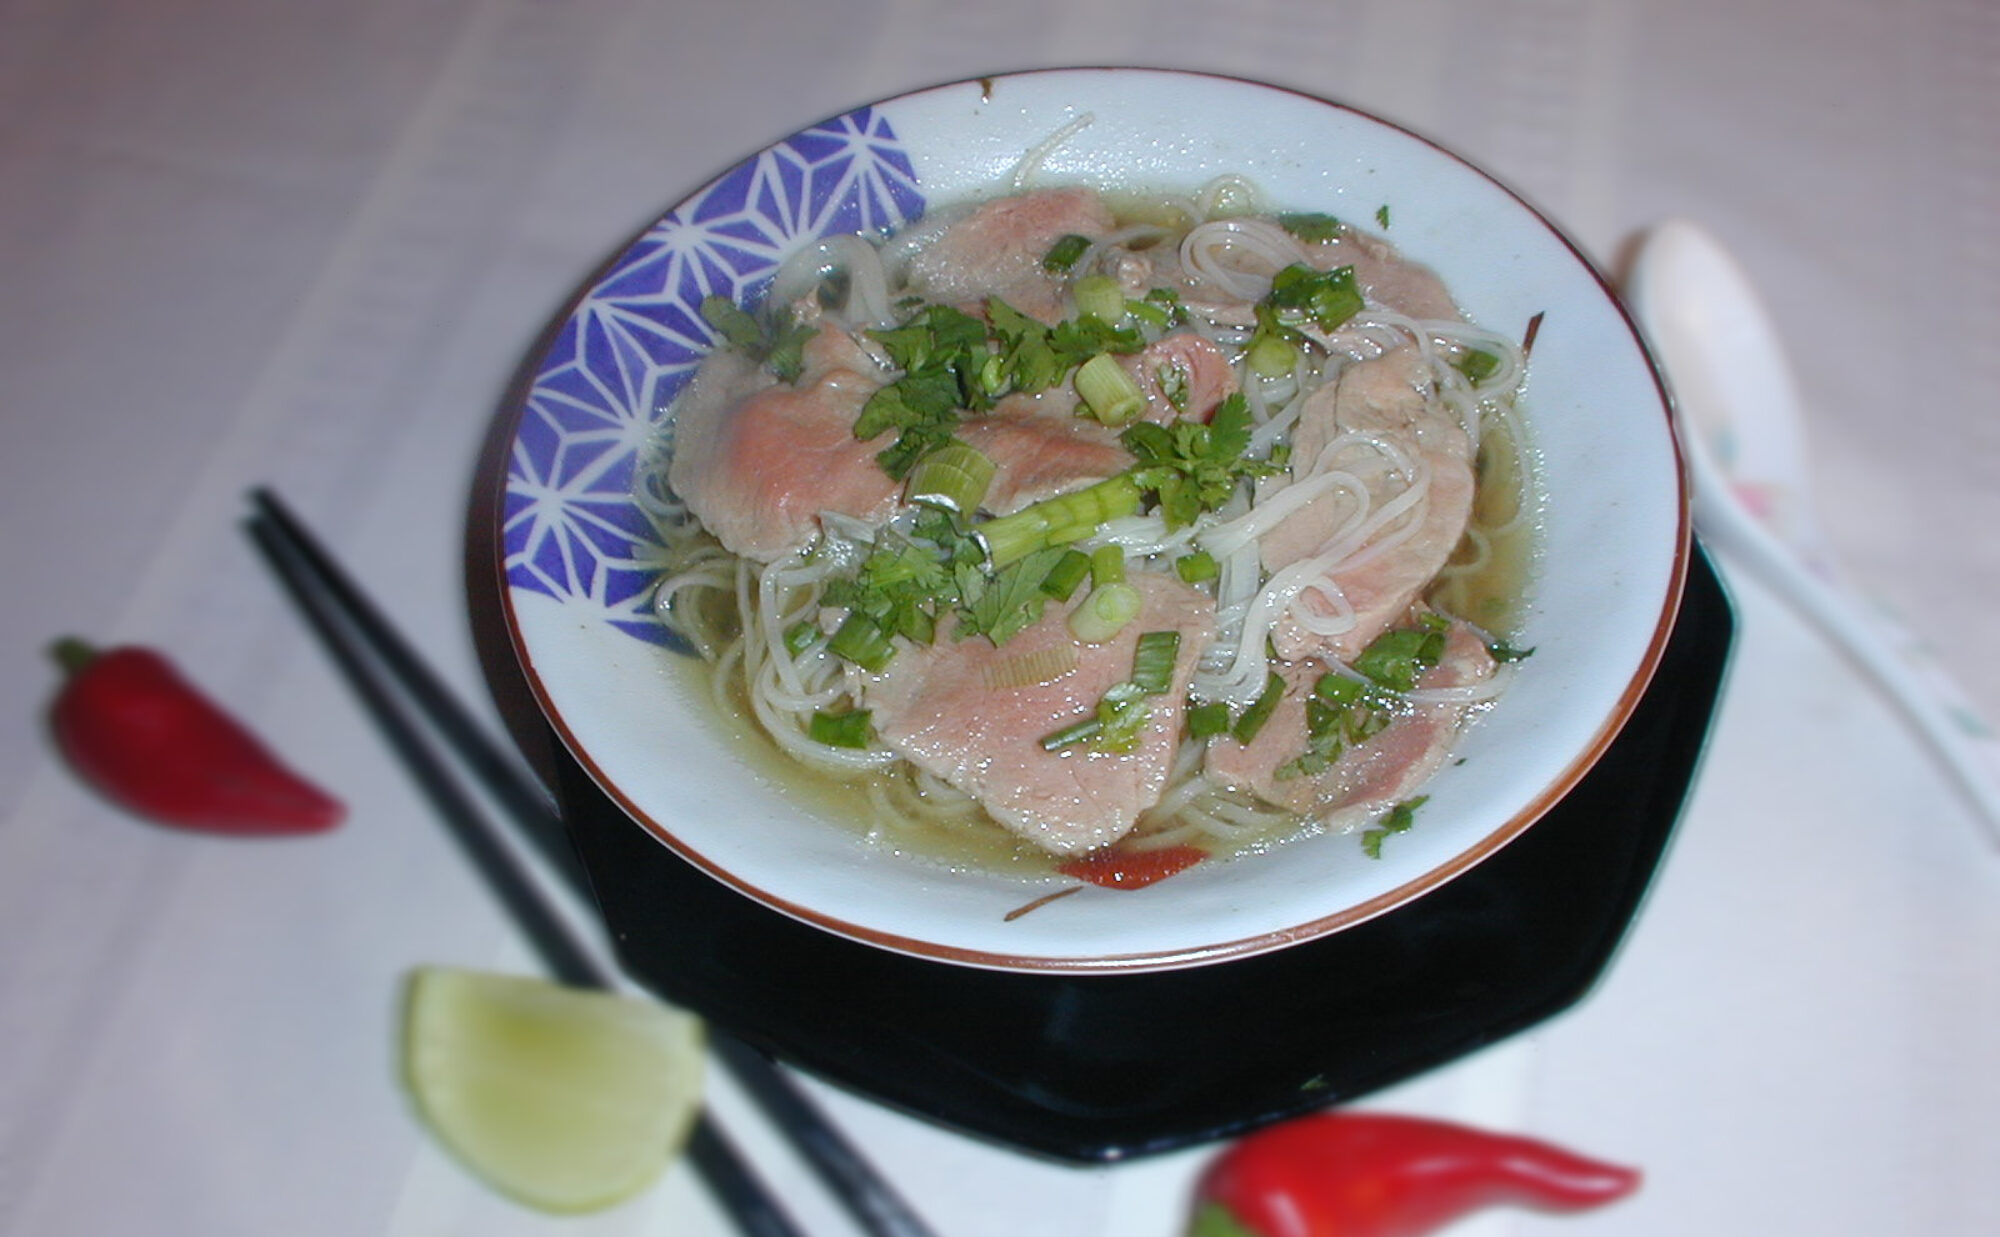
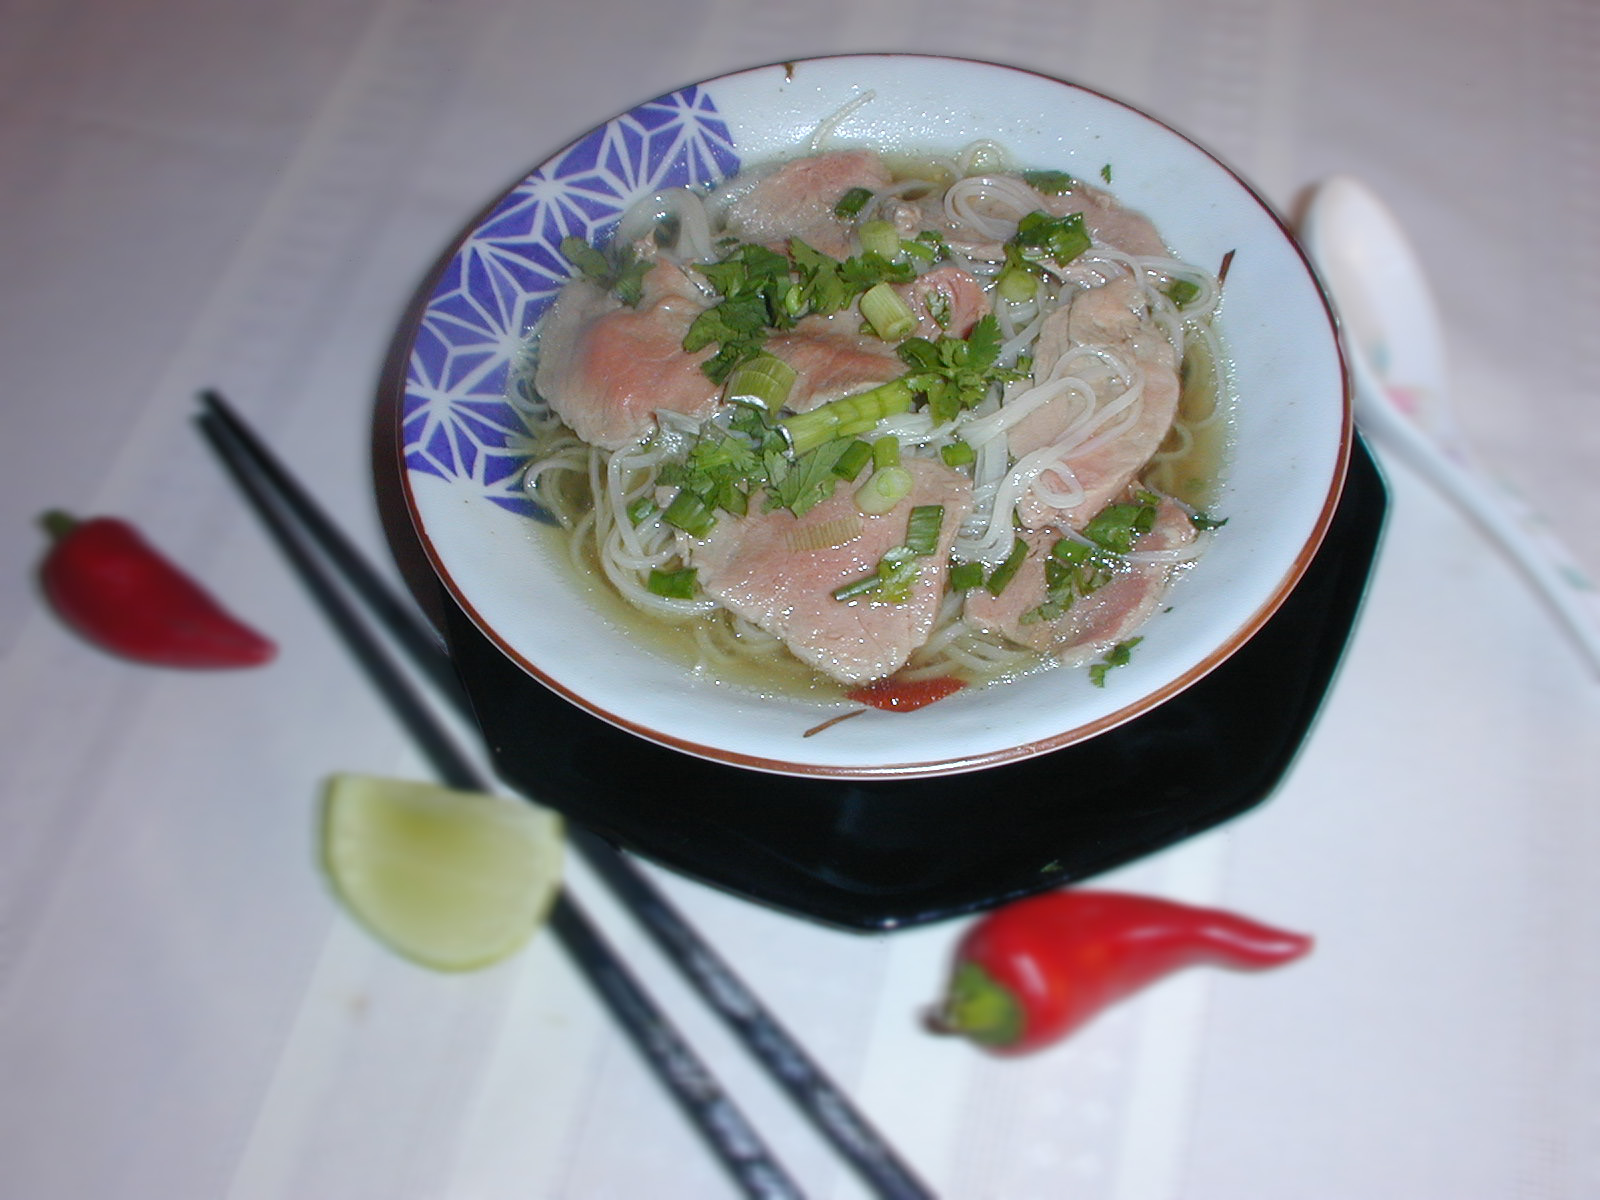
Setup Pho Bowl

Separate desired amounts of cooked Phở noodles into four medium to large bowls. I usually use from 8 oz to 10 oz of cooked noodles per bowl depending on how hungry we are. Spread 10 to 12 pieces of thinly sliced raw beef on top of the noodles in each bowl.

Pour the hot broth on top of the noodles and beef. Fill to the rim. The broth’s heat cooks the beef to medium-rare. If one prefers his/her beef to be well done, place the beef in a soup ladle into the simmering broth. Cook the beef to the desired texture.

pho bo

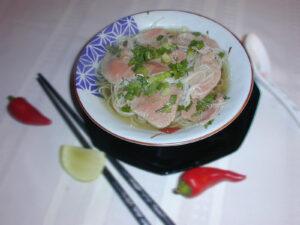
Add a few squirts from a lemon wedge to your bowl. Mix in the desired amount of green onions, cilantro, bean sprouts, mints, and basil leaves. Add the optional condiments such as red peppers, chili sauce, and Magic Monkey or Dragon sauce.

Vietnamese Egg Roll Recipe – A Vegetarian Delight

eggrolls-veggie

Makes 50 to 60 egg rolls
Preparing time: 60 to 90 minutes
Cooking time: 90 minutes

Egg rolls, known as chả giò, are popular Asian finger food. Everyone has a different way of preparing egg rolls. Bác Kít, my aunt, has her special way. Traditionally, they are composed of miến noodles, mushrooms, carrots, cabbage, eggs, pork, chicken, and seasoning.

In this article, we will make our egg rolls with vegetable filling. This is a Vietnamese egg roll recipe and a vegetarian delight. The primary key to yummy egg rolls is crunchy outside yet soft with a balanced amount of tasty vegetables inside. You can also find a meat egg roll recipe online at Homemade Meat Egg Roll.

bun cha gio

There are three different ways to eat the egg rolls:

  1. Eat the egg rolls by themselves as finger food.
  2. Prepare them in vegetable wrap. The egg rolls are cut into 1-inch bite-size pieces. Each piece is wrapped in lettuce with several strands of rice noodles, and a few leaves of cilantro. It is then dipped in a sweet and sour dipping fish sauce.
  3. Serve with noodles. The egg rolls are cut into 1-inch bite-size pieces. The pieces are placed on top of rice noodles with lettuce, cilantro, bean sprouts, and Sweet and Sour Fish Sauce or Sweet and Sour Soy Sauce Mix. Mix all the ingredients and chow down.

As the owner of this website, I tracked down special deals for some products or services mentioned herein. As an Amazon Associate, I earn from qualifying purchases. When you use the link from this page to make a purchase, I may receive a small commission to support this website, and you may receive a great bargain – Full Disclosure.

Ingredients

You may have problems finding some ingredients below in your neighborhood American grocery store. You can visit the closest Asian / Vietnamese grocery near you or Asian Grocery in Central Florida for the special ingredients. I also included a direct link to Amazon by clicking on the picture or name of the hard-to-find ingredients for your convenience.

1 (1.8-ounce) package miến bean thread noodles


¼ cup pre-chopped black dried fungus mushrooms


OR (slice them into thin slivers) 4 ears medium dried black fungus mushroom


60 frozen egg roll skins (my favorite brand is TYJ Spring Roll Pastry. You can find this brand in your local Asian Vietnamese store. If you have extra packages, you can freeze the un-open packages for another time. Make sure to keep them seal well or they will dry up. The only location I found for the online purchase is Amazon (expensive shipping and 500 in quantity)

3 carrots

1 (½ to 1pound) small cabbage

½ medium onion

1 to 2 sweet potatoes (optional purple outside and yellow flesh)


1 small 12 oz jicama


1 or 2 taro

1 to 2 blocks of firm fried tofu (Click here –> How to fry Tofu)

2 eggs (optional)

1 tsp salt

1 tsp vegetarian mushroom sauce

¼ tsp pepper

1 tsp all-purpose flour

3 cups vegetable oil

Prepping instructions

Soak the dried noodles and mushrooms in separate bowls of hot water for approximately 10 minutes. soaked-mushroom-noodles

Allow the frozen egg roll skins to de-thaw for 30 minutes. Clean and drain the vegetables.

Peel the carrots, taro, sweet potato, onion, and jicama. Peel and discard the dead leaves on the cabbage.

veggie-ingred-eggrollsT

Shred the carrots, cabbage, taro, sweet potato, and jicama. You can do it manually with a shredder or with a food processor to speed up time.

Dice the onion into small pieces. Dice the fried tofu into small pieces also. Cabbage and jicama produce lots of juice after being shredded. Squeeze as much juice from the shredded cabbage and jicama as possible with cleaned hands. It is ok if you cannot squeeze out all of the juice. A little vegetable juice is better than too much. Draining the juice prevents the egg rolls from being soggy. Mix the shredded vegetables in a large mixing bowl.

eggroll-filling

Remove the mushrooms & noodles from the water. Squeeze the water from the mushrooms and noodles with cleaned hands. Cut the noodles into 1 to 2 inch long strips. If the mushrooms are not pre-chopped, chop them into fine thin pieces. Mix the shredded vegetables, diced fried tofu and onion, mushrooms, noodles, salt, vegetarian sauce, pepper, and optional eggs.

Combine flour and 2 teaspoons of water in a small bowl. Mix into a paste. Use the paste to stick the flap of the egg roll skin to the egg roll. Wrap The Egg rolls.

Wrapping procedures

(Some egg roll skin wrapper packages may contain illustrations and/or instructions for wrapping procedures):

Peel the egg roll skins apart. Place one egg roll skin on a large plate. Rotate so that a corner faces you.

Place the filling eggroll wrapping
Fold the Right Wingeggroll wrapping 2
Seal the Endeggroll wrapping 7
Fold the Left Wing eggroll wrapping 3
Shape and Rolleggroll wrapping 5
Completeeggroll wrapping 6

Place 1 heaping tablespoon of the meat and vegetable mixture in the center of the paper. Spread the mixture 2½ to 3 inches perpendicularly to the corner facing you. Flip-up the corner facing you over the mixture, such that the fold is flush against the meat and vegetable mixture. Flip the left and right corners evenly over the first fold such that the new folds are flush against the meat and vegetable mixture.

Roll the folded shape tightly away from you. Make sure any loose ends of the egg roll skin are neatly tucked in. Tucking in loose ends reduces crumbs when frying. The roll should be tight enough to prevent the mixture from escaping during frying. Spread flour paste thinly on the last corner of the paper and continue rolling over the corner. The paste glues the end to the roll.

DeLonghi Deep Fryer

Warning:

When frying, do not allow the oil to become too hot. The outside of the egg rolls will burn but the inside will be uncooked. The deep fryer maintains the oil at a constant temperature hence the cooking inconsistency will be eliminated. I have been using a brand DeLonghi deep fryer for over 10 years. It has been serving me very well. I allowed the oil to preheat for 9 to 10 minutes then I fry the egg rolls for 7 minutes or as golden as you like. It’s simple and splatter-free.

Frying Instructions

If frying in a frying pan, preheat the oil in a deep fryer or a deep non-stick frying pan for 1 to 2 minutes at medium heat. Dip the tip of an egg roll into the fryer to test for the temperature of the oil. Wait until the oil fizzes. Place the egg rolls into the fryer. Fry the egg rolls in batches of 10 or until you cannot fit anymore. Avoid stacking them.

Depending on how hot your heat is and at your judgment, fry each batch at medium heat for 15 to 20 minutes or until golden brown. Make sure to constantly rotate the egg rolls frequently (like every 1 to 2 minutes). Place two paper towels on top of a plate. Transfer the fried egg rolls to the plate. Use a paper towel to blot the excess oil from the egg rolls.

Baking Techniques

You can also bake the egg rolls as well as using an air fryer. With the baking in the oven or air fryer, make sure to brush a little vegetable oil on the outside of each egg roll before you bake them. Bake them in the oven at 400 degrees for about 20 minutes or until slightly golden. I have not tried the air fryer yet but my aunt has. She said it turned out very good for her.

eggrolls-veggie2

Conclusion:

Egg rolls are great appetizers and fun finger food. I often make a big batch to eat over a period of time. There are usually leftovers so I freeze them.

You can freeze the egg rolls in two ways:

  1. Freeze the wrapped and uncooked egg rolls until ready to be fried. When ready to fry, do not de-thaw the egg rolls. Place them immediately into the hot oil. This prevents the egg rolls from becoming soggy.
  2. Freeze the fried egg rolls until ready to eat. Heat them with a toaster oven, an oven, or an air fryer.

Place the egg rolls side by side in a large Ziploc freezer bag. Do not stack them. One gallon bag can hold from 16 to 18 egg rolls.

Tips:

After frying many egg rolls for 30 to 40 minutes, many burnt flakes and crumbs blacken the oil in the frying pan. If you do not own a deep fryer, one way to avoid blackened egg rolls when frying is to fry them in two separate pans. Pour 2 cups of vegetable oil into a non-stick frying pan. Preheat the oil at medium heat for 1 to 2 minutes.

Do the fizz test with an egg roll. Place the first batch (10 to 12 egg rolls) into the frying pan. Fry the egg rolls for 2 minutes on each side. Pour 6 cups of oil into a non-stick deep saucepan. Preheat the oil at medium heat. After 4 minutes of frying on each side of the egg rolls, transfer the egg rolls from the frying pan into the saucepan.

Place the second batch of uncooked egg rolls into the frying pan. This time, allow the second batch to fry for 16 minutes in the frying pan. Rotate every 2 minutes. Fry the transferred egg rolls for 11 minutes in the saucepan. Rotate occasionally. Fry the egg rolls for the last 5 minutes at medium-high heat.

Transfer the finished egg rolls to a dish. Transfer the second batch of egg rolls from the frying pan to the saucepan. Continue to fry for 4 more minutes at medium-high heat. Apply the same procedures to the remaining uncooked egg rolls. This process is rather lengthy, but it will produce nice golden egg rolls.

I love to hear about your experiences. Please leave your comments below.

Vietnamese Steamed Buns – Little Piggies

banh bao piggy

In this article, we will be showing you how to make Vietnamese steamed buns called “Bánh Bao”. We will shape it into a little piggy. The regular steamed buns are often available at Vietnamese grocery stores or bakeries.

I extracted the recipe from a video on YouTube.com called “Bánh Bao – New York/combo bun” by Tien Hoang. This video is in Vietnamese. I translated and converted the recipe content into English. I modified the recipe to make it work for the piggy shape. The procedure is straightforward. I think the most lengthy process is when we divide the meat and the dough into even proportions. The best part is shaping the piggies.

This recipe was created solely for my demonstration for Orange County Libary System. When following the instructions, the steamed bun turned out perfectly each time when I made them. I decided to make this recipe available online to share with others. Please read through first before you start. I hope you find it useful and tasty.

cooked-piggy

As the owner of this website, I tracked down special deals for some products or services mentioned herein. As an Amazon Associate, I earn from qualifying purchases. When you use the link from this page to make a purchase, I may receive a small commission to support this website, and you may receive a great bargain – Full Disclosure.

Ingredients for the Filling

Meat filling (split into 16 even meat portion ~50g – 80g per)

Ingredients for the Dough

  • 4 cups all-purpose flour (Red Lotus All-Purpose)
  • 1 cup tapioca starch (bột năng)
  • ½ cup sugar
  • 1 tsp salt
  • 4 tbsp Cisco shortening
  • 2.5 tsp yeast (fast-acting)
  • 2.5 tsp baking powder (double acting)
  • ¾ cup fresh milk (room temperature)
  • 260 – 280 ml cup (1 to 1 ¼ cups) of room temperature water

Split into 16 portions (~80g per) + 1 portion (40 – 60g, leftover flour)

Prepare the Filling

Boil the eggs. Once cooked, allow them to cool immediately in cold water for easier peeling. You can use quail eggs or regular eggs. For the regular eggs, I used a piece of thread to cut an egg into quarters instead of the knife.

Either egg will work well. Quail eggs are cuter. Soak the clear noodles and the fungus in warm water for 10 to 15 minutes.

soaked-dry-ingr

For the Chinese sausages, the following instruction is optional. Fill a small saucepan with 3 to 4 cups of water. Bring it to a boil. Add the sausages to the boiling water. Allow them to cook for 5 minutes or until the sausages float up. Remove them and empty the saucepan. With the same saucepan, pan-fried the sausages. You do not need to add any oil. There should be enough oil excreting from the sausages. Flip them back and forth to get them slightly golden. Remove the sausages. Slice them into thin slices.

sausages and eggs

The boiling process cleans out the dye in the Chinese sausages if any. The pan-fried process firms up the skin and make the sausages crispy and crunchy. If you are not doing the boiling and pan-frying, then slice the sausages into thin slices. Dice the onion.

Combine ground meat mushrooms, diced onion, sausages, salt, sugar, and pepper. Mix well. Knead the meat mixture and split it into 16 portions. Roll them into balls and add 1 egg into the center of each meat. (Make approximately 50g to 80g per ball depending on how much ground meat you use.)

Place the meatball fillings in a pie dish so you can steam them in a steamer. Steam for 20 minutes or until the meat is almost done. After the meatballs are done, remove the meatballs from the steamer and the juice. Allow them to cool completely.

meatball-filling

Make the Dough

While the meat is steaming, we can prepare the dough. Mix the flour, tapioca starch, sugar, salt, shortening, yeast, baking powder, and milk. If you have an electric dough mixer that would definitely make things easier and faster. Mix at a low level to start. Do not add all the water to the ingredients all at once. Add a little at a time to make sure the dough will not be too wet.

Slowly increasing the level to 4. Continue to mix until the flour clump together smoothly and feel elasticity. It should not be sticking to your hand. Split the dough into 16 portions of 80g. You should have about 40 to 60 g of dough leftover. Roll the flour portions into smooth round balls. You can use the loose flour to help with the stickiness.

Divide the left-over flour into 16 small balls. We will use these extra balls to make the snout and the ears. We will use the peppercorn for the eyes. Cut wax paper into 16 (2×2 or 3×3 inch) squares. We will place the wax paper under each bun.

Forming the Piggies

Flatten out the ball of dough and place the meatball in the center. Gently wrap the dough over the meatball. Cover it completely and round it out in the palm of your hand. Place it on the wax paper. Split the small extra dough into 3 portions. Two portions will be similar and the third portion will be slightly bigger. The bigger portion is the snout. Find a good location on the stuffed dough for the nose. Use a toothpick to stick the small dough to the stuffed dough. dough portions

Flatten out the two small extra dough. They will be used as ears. Place them where you would like the ears to be. Add the peppercorn eyes. You now have something that looks like a face of a pig. Repeat the same process for 15 more buns.

piggy uncooked

Once completed, place the piggies in the steamer. Bring the water to a boil and then add the layers that contain the bánh bao. Place a cloth or towel that can cover the steamer. Close the lid. This will prevent the condensation of water from dripping on the buns. Cook for 15 minutes. Remove steamed buns and allow them to cool.

Keep them refrigerated once they cool down. The piggies will keep for one week. You can also wrap and freeze the buns to keep for a month or more. To reheat, you can steam them for 15 minutes or place them in a microwave for 30 to 40 seconds.

Conclusion

This batch should yield approximately 16 piggy buns. For the filling, you can make it meatier or less. I prefer not too much meat. I would lean toward 1 pound of meat instead of 2. The mushrooms and clear noodles can be optional as well. You can add other ingredients such as jicama or Shiitake mushrooms or substitute them. The filling is flexible.

bready-piggy
Bread flour version

For the flour, there is “bánh bao” flour available. It is already mixed flour so it should be simpler. banh bao mixed flourWe can find this type of flour in Vietnamese grocery stores.

Do not use bread flour. I ran out of all-purpose and needed 3/4 cup more. The only flour I had available was bread flour. I found out the hard way. It did not work as well. The texture and flavor were different. It became more bready. All-purpose flour works best. The Red Lotus flour was recommended for a whiter color. Personally, I am OK with any all-purpose flour.

The buns are great for breakfast or a quick snack. If there are any questions, please feel free to leave me a comment below. I would love to hear how the recipe works out for you. Enjoy!

Vietnamese Egg Coffee Recipe – Simple Step-by-step Instructions

egg coffee

The holidays are coming fast and furious for 2020. Vietnamese egg coffee reminds me of the holiday eggnog drink. To celebrate the holiday with something familiar yet exotic, we will be showing how to make egg coffee or cà phê trứng with a Vietnamese Egg Coffee recipe I have learned and researched. There are different recipes available on the internet. I used the techniques from different recipes along with my own experiences to make this recipe as simple and straightforward as possible.

In addition, the egg coffee is creamy, sweet, and delicious. You can partake of this drink at any time. No need to wait until the holidays to enjoy the richness of coffee.

egg coffee

History of Egg Coffee

What is egg coffee? It is exactly what the name offers — the combination of egg and coffee. During the first Indochina war around 1946 in Hanoi, there was a shortage of milk in Vietnam. Nguyen Van Giang came up with a new creamy concocted coffee to help substitute for the lack of milk. At that time, he was bartending at a renowned hotel called Sofitel Legend Metropole Hotel in Hanoi.

The drink became so popular that Giang decided to open his own coffee shop called Cafe Giang. He was known as the original Vietnamese egg coffee king. Cafe Giang is now being managed by his son, Nguyen Van Do in Hanoi’s Old quarter. The traditional recipe has been kept hidden since the 1940s. Over the years, there are different renditions of creating egg coffee such as egg yolk, butter, sugar, condensed milk, and sometimes cheese is added. However, the secret is to use the main ingredient egg yolks adding to the coffee without the egg flavor taste.

Please make sure to read through the recipe at least once to be familiarized with the procedure. It will definitely make your life easier and be prepared for what to expect.

As the owner of this website, I tracked down special deals for some products or services mentioned herein. As an Amazon Associate, I earn from qualifying purchases. When you use the link from this page to make a purchase, I may receive a small commission, and you may receive a great bargain – Full Disclosure.

making of egg coffee

Ingredients

  • 1 to 2 tablespoons of ground coffee:
    Trung Nguyen Coffee OR Cafe Du Monde
    (2 most common Vietnamese Coffees)
  • 1 to 2 tablespoons of condensed milk
  • 2 egg yolks
  • (optional) 1 packet of vanilla sugar OR 1 teaspoon sugar and 2 drops of vanilla
  • (optional) sprinkle cinnamon or nutmeg

The amount of coffee being used is totally up to the coffee drinker. The traditional amount is 1 tablespoon. If you prefer a stronger flavored coffee, add 2 to 3 tablespoons of ground coffee. The same goes with the sweetness of the coffee. I find 2 tablespoons of condensed milk is very sweet. However, my daughter loves it. For me, 1 tablespoon of condensed milk is perfectly enough.

Pasteurize the eggs

We will be using raw egg yolks. If you are concern with the risk of Salmonella infection, we can pasteurize the eggs. By pasteurizing the egg, we bring the water to 140 degrees F temperature. First of all, make sure to have the eggs at room temperature for at least 5 to 10 minutes.

Balance the water at 140 degrees temperature and submerge the 2 room temperature eggs completely in the water for 5 minutes. I have a gas stove so I used the lowest setting on my gas stove once my temperature hit 140 degrees. A cooking thermometer would be very helpful to monitor and maintain the heat. We don’t want the temperature much higher than 140 for a long time because we don’t want the eggs to be cooked.

Sous Vide
Anova Culinary AN500-US00 Sous Vide Precision Cooker (WiFi), 1000 Watts | Anova App Included, Black and Silver

Keeping the temperature at 140 degrees for 5 minutes can be challenging. If you don’t want to deal with the hassle, check out a gizmo called Sous Vide.  It is a cooking rod that circulates and brings the water to a precise set temperature and stops at a set time. The rod is placed in a pot of water. Once the temperature is at the desired setting, put the food in a vacuum bag and place it in the pot. Set the desired time and it turns off automatically when the time is up. In our case, we just put the eggs in the water set the temperature to 140 degrees for 5 minutes.


Fill a small to medium bowl with cold water. Once the five minutes are up, transfer the eggs into the bowl of water. The eggs are now ready to be processed.

Process the egg

The next step is separating the yolk from the egg white. It is a little trickier when the egg is not cold. The yolk can be easily punctured and that would make it harder for you to separate the yolk from the white. Here is a fun article on how to separate the yolk in four different ways => how to separate eggs. You can choose one or try them all to see which one works best for you.

egg yolks

I like using the eggshells to separate the eggs. I enjoy the challenge of transferring the yolk from one eggshell to another without puncturing the yolk. It is even more challenging when the eggs are warm.

Once the yolks are successfully transferred, add the condensed milk, and/or vanilla sugar. The amount of condensed milk is totally up to you. If you like it sweet add 2 tablespoons and if you like it less sweet use 1 tablespoon. Personally, 1 tablespoon is enough sweetness for me.

egg blending for 2 minutes
Egg blending for 2 minutes
egg blending for 10 minutes
Egg blending for 10 minutes

Use an electric mixer and blend the mixture. Start your timer for this. It may take up to 10 minutes of mixing before your mixture becomes a smooth, thick, and frothy cream. The color slowly transforms from yellow to a light vanilla color after 6 or more minutes of mixing. It is a pretty neat chemistry reaction.

drip coffee

Make the Vietnamese drip coffee

If you do not know how to make the Vietnamese drip coffee, please click on Cafe Sua Da Recipe for the full instructions. In our case, you will make straight black coffee with no ice. We do not need to add the condensed milk to the cup of coffee unless we like it even sweeter. We are already mixing the sweet condensed milk with the egg yolks.

Fill a bowl with hot water. Once the drip coffee is completed, we can place your cup of coffee in the bowl of hot water. Be careful not to have the hot water higher than the cup. We wouldn’t want unwanted water to leak into our coffee. We can keep our coffee nice and warm while we are finishing up the blending of our egg yolk mixture.

Conclusion

The last step is combining everything together. Once the drip coffee is completely done, pour the whipped egg yolk mixture on top of the coffee. It should be thick, frothy, and airy that the cream floats on top.
With the final touch, sprinkle a little bit of nutmeg or cinnamon on top.
egg coffee

You can drink coffee in two ways:

  1. Keep the frothy cream and the coffee separated. You can taste the contrast of the sweetness and bitterness combined with smooth and warm flavors sliding down your throat.
  2. Mix both the cream and the coffee together. Allow the two to intertwine and blend in a heavenly yummy texture and flavored coffee.

Either way is totally delicious and purely decadent. I enjoy the blending of the two flavors. Enjoy!!!

I love to hear how this recipe works out for you. Please leave your comments below.

Seafood Stir Fry Recipe – Fresh, Colorful, Delicious and Simple

fresh veggie

This recipe was inspired by a Vietnamese recipe in Vietnamese on YouTube called Sweet and Sour Seafood Stir fry. I translated the recipe, altered it and made my Seafood Stir Fry Recipe. It is very simple and colorful yet fresh and delicious with natural flavors of sweetness and sour integrated from the vegetables.

fresh veggies

This recipe originally included primarily squid tube and no shrimp. I added the shrimp. The squid tube was not easily available at grocery store in general so I substituted squid rings. Hence, this is a simple and flexible seafood stir-fry. You can modify it to your liking.

I had a LIVE demonstration on how to create this dish on July 8, 2020. Here is the recorded LIVE broadcast:

Serve approximately 6 people.

As the owner of this website, I tracked down special deals for some products or services mentioned herein. As an Amazon Associate, I earn from qualifying purchases. When you use the link from this page to make a purchase, I may receive a small commission, and you may receive a great bargain – Full Disclosure.

Ingredients

    • 1 pound squid rings
    • 1 pound shrimp
    • 1 green bell pepper (approx 6oz)
    • 1 yellow bell pepper
    • 1 orange or red bell pepper
    • 1 medium onion
    • 1 medium tomato
    • 6 oz pineapple
    • 4 cloves garlic
    • A small bunch cilantro
    • 1 tbsp lemon
    • 2 tsp oyster sauce
    • 1 tsp salt
    • ½ tsp sugar
    • ¼ tsp pepper
    • 1 tbsp oil
  •  
 

Process and Marinate the Seafood

Peel the shrimp. Clean the shrimp and squid in slightly salted water. This helps decrease the fishy smell. Drain the seafood. Place them in a bowl. Flatten the garlic with the edge of a knife. Cut and dice it. Add ½ amount of the following ingredients: garlic, salt, sugar, and pepper to the seafood bowl. Squeeze the lemon juice (1 tablespoon) into the mixture. Allow the seafood to marinate for 10 minutes.

marinate seafood

Prepare the Vegetables

While the seafood is marinating, washing and clean all the vegetables. Slice all the bell peppers into wedges. Slice the onion and tomato into wedges as well. Slice the pineapple into diagonal slices. Chop the cilantro into small segments. bell pepperssliced veggies


Make the Stir Fry

In a frying pan, add 1 tablespoon of oil. Turn your stove to medium-high. Add the remaining garlic. Mix it into the oil and allow it to turn slightly golden and crunchy. Add the marinated squid and shrimp.

shrimp-squid

Cook for about 3 minutes or until the shrimp turns pink. It is hard to judge with the squid rings because the color remains the same. Continue with the medium-high heat. Transfer the seafood into a bowl.

colorful veggies

Add the onion, the bell peppers, the pineapple, and lastly the tomato wedges to the empty pan. Mix well. Cook for another 3 minutes. We do not want to overcook the vegetables and take away the crunchiness texture.

seafood stir fry

Add the seafood to the vegetable mixture. Pour in the other ½ amount of the salt, sugar, and pepper. Add the oyster sauce. Mix everything well. Sample a little of the mixture. Add more salt as needed. Finally, sprinkle in the cilantro. Mix well. Turn off the stove. Transfer the mixture to a plate. This colorful rainbow of seafood mixture is completed. Serve with rice. Enjoy!

Conclusion

This batch should yield approximately 74 ounces which serve approximately 6 people with 12 ounces per person. Here is an estimated calories count:

Calories per ounce: 22Kcal, Protein: 2.94g, carbohydrates: 1.36g, Fat: 0.52g

Serves approximately 74 ounces for 6 people = 12 oz per person,

Calories per person – 264 Kcal, protein – 35g, carbs – 16.32 g, fat – 6.24g.

seafood served on rice

Is squid healthy for you? Here is an interesting article that talks more about squid and cholesterol => Squid and Cholesterol: the Calamari Conundrum by Healthline.com. It mentioned that most of the time calamari is being served fried which is not so healthy for you. However, this recipe is served with very minimum oil and plenty of colorful vegetables. Like anything in life, eat everything in moderation. Even if it is good for you.

Love to hear from you and your trial and error. Please leave your thoughts below.