Welcome Back to School – Learn to Make Green Papaya Salad

back to school board

The summer of 2018 is quickly passing through already. Today is an exciting day for my kids. It’s their first day back to school. However, they are now teenagers, senior and sophomore in high school, and no longer toddlers learning how to read ABC or counting 1, 2, 3. How time flies so quickly. It is nice to look back and smile but now I am enjoying the present and moving forward.back to school board

Did you know that fat is an important nutrient that is necessary for your health? I am talking about good fat such as fat in fish, nuts, avocado, and many other nutritious foods. Some contain omega-3 fatty acids, a type of polyunsaturated fatty acid, that may help lower cholesterol levels and support heart health.

One thing I notice about my Vietnamese diet is that I do not have enough fat in my food. There is definitely more carbohydrates with a low amount of fat. A low-fat diet has an impact on my skin. It is constantly dry. Drinking water and adding lotion help but only so much.

Avocado

I decided to give avocado an experiment and add more fat to my diet. I was never a fan of avocado until recently. I have been introducing my body to an avocado smoothie once a day for the past eight months. I do notice a subtle difference over time. I do not have to apply as much lotion to my skin as I used to. My face is definitely less dry. Hopefully, it will reduce the number of wrinkles on my face and I will look much younger… Heeee Heee Heeee. I will look forward to that impact. I wonder if it would replenish more new black hair instead of grey.

I love to hear your thoughts about good fat and if you notice any good benefits to your body and overall health. Please leave your thoughts below.


Many new and exciting opportunities from the beginning of 2018. I am constantly looking for new ideas and new ways to prepare chicken. I found a nice chicken recipe that included avocado and I gave it a try. Here is my version.Cilantro-lime chicken with avocado salsa

The original recipe has the chicken grilled and served as one large piece. I cut mine up into bite-size chicken strips. Click here for the recipe –> Cilantro-Lime Chicken with Avocado Salsa.

Are you ready to learn more? Join us for a fun-filled and hands-on demonstration of Vietnamese cooking this coming Sunday, August 19, 2018, from 3p to 4p at the Maitland Public Library. We will make another Vietnamese appetizer called Vietnamese Green Papaya Salad. It is a free event for library patrons. Please RSVP to 407-647-7700 to reserve your seat. Seats are limited.

https://www.facebook.com/events/1830447117034519/?active_tab=about

papaya salad with shrimp

Pho Queen is on Facebook. It is convenient, easy to use, and many people already have an account with Facebook. Please visit me on Facebook for more frequent updates — https://www.facebook.com/phoQueenCooking/ and like me…You can also visit me at my website TastyPhoQueen.com

Love to hear your thoughts, questions, or comments. Please leave your comments below or click on CONTACT to share with us your thoughts.

See you at the demo!

Happy Eating Healthy!

Ph Queen

www.TastyPhoQueen.com
MORE Vietnamese Recipes

Steamed Rice Cake Recipe – Vietnamese Bánh Da Lợn

steamed layer rice cake

Steamed Rice Cake Recipe was introduced to me by my aunt. It was prepared and taught in Vietnamese by Vành Khuyȇn Lȇ. I translated the instructions into English. It is a gluten-free and vegan recipe. steamed layer rice cake

As the owner of this website, I tracked down special deals for some products or services mentioned herein. As an Amazon Associate, I earn from qualifying purchases. When you use the link from this page to make a purchase, I may receive a small commission, and you may receive a great bargain – Full Disclosure.

Ingredients

  • 400 g or 3 ½ cups Tapioca Starch (available at the Asian Grocery store or Amazon.com)tapioca flour
  • 100 g or 1 cup Rice flour (available at an Asian Grocery store or Amazon.com)rice flour
  • 7 Pandan Leaves or 2 squirts of green food coloring and 1 teaspoon of vanilla extract (Pandan extract available at your local Asian stores or on Amazon.com)pandan extract
  • 1/8 tsp salt
  • 250 g to 300 g or 1¼ to 1½ cups of sugar of your choice (Stevia, organic sugar, etc)
  • 100 g or 1 cup steamed mung beans (available at an Asian Grocery store or Amazon.com)
  • 1 (400ml) can coconut milk (If you like coconut milk, you may add 2 cans for more coconutty flavor)pandan leaves processedpandan leaves extraction

Green Color Preparation – Pandan leaves extract

Pandan is an herbaceous tropical plant which also known as palm pine or screws pine. It is often grown in Southeast-Asia. It has a unique sweet aroma. Vietnamese use pandan leaves in many flavored desserts and drinks.

Clean the pandan leaves. Cut the leaves into ½ inches and drop them in a smoothie blender. Add 2/3 cup of water. Use a smoothie blender to grind the leaves into pulp.

Place a piece of cheesecloth over a small bowl. Pour the pulp and all the content from the blender over the center of the cloth. With washed hands, lift up all the corners of the cloth and make sure all the content stays in the center. Squeeze and extract as much juice possible from the pandan pulp into the small bowl. The juice color should be green.

If you cannot find pandan leaf in your grocery store, you can use green food coloring and vanilla in substitution. There is also pandan leaf extract available in Asian stores. If you can find the extract or use food coloring, then you can skip the green color preparation.

Yellow Color Preparation – Steamed Mung beans

Mung Bean is a plant species in the legume family. It is commonly grown in Asia and found in many Vietnamese desserts and drinks. Mung bean is also used to sprout bean sprout.

There are two types of mung bean the yellow color prepped mung bean and the whole mung bean with a green shell. The natural color of the mung bean is light yellow. It is usually dyed to a deep and darker yellow. I do not know why. I am guessing that the darker yellow is more appealing and appetizing in Asian culture. I generally use the whole mung bean with no dye.

Soak a bag of mung beans in water overnight or at least 3 hours to separate the shells from the mung beans. Make sure there is enough water to cover all the mung beans.

Clean the mung beans and remove all the shells. Pour water half-way up the bottom pan of a steamer. Place a polyester cloth on top of the steamer with holes. Pour the clean mung beans on top of the cloth. Fold the remaining cloth on top of the mung beans to protect it from the wetness of the steam vapor. Steam the mung beans for ten minutes or until the beans are cooked. When you can squish the beans with two or three fingers easily, the mung beans are cooked.

For this recipe, we will be using only 1 cup of the steamed mung beans. Because it is a process to steam the beans, I make a large batch. Use only what I need and store the rest in a zip lock bag and freeze it.

Place the beans in a mixer or blender. Add 100 ml or 1/3 cup of water. Blend the bean into a fine pulp. Put it aside for a moment. mungbeans processed

Prepare the flour for layers

To make Bánh Da Lợn, you can have multiple layers with multiple colors and flavors. In this recipe, we will be making only two color layers. The process is the same for multiple colors and flavors.

Have four bowls ready to prepare the flour. Split the tapioca starch flour into two bowls. Each bowl should have 200g or 1¾ cups. Also, split the rice flour into the two bowls. Add 50 g or ½ cup of rice flour to each bowl. Mix them.

Prepare the liquid ingredients coconut milk prep

In a small saucepan, pour in a can of coconut milk. Add 400 ml or 2 cups of water or optional coconut water. Add sugar and salt. Mix well over low to medium heat until sugar is completely melted. This mixture should yield four cups. Allow coconut mixture to cool.

Combine and filter the Ingredients

Once the coconut mixture is cool, divide it into two portions. Pour each half (2 cups) into each flour bowl. Mix them well. Use a sieve to filter out any possible flour clumps for each of the flour. You should have two extra bowls for the filtered flour mixture.

For one bowl, add the mung bean pulp for the yellow coloring. For the second bowl, add the 100 ml or 1/3 cup of pandan green coloring (2 drops of green color or 2 drops of pandan extract). If you are using the food coloring, add vanilla extract. You do not need the vanilla extract when using the pandan extract. The pandan has its own unique flavorful aroma.

Mix well for both bowls. For the yellow mung bean mixture, use a sieve to once again filter the mixture. This will ensure there are no mung bean clumps. We want a smooth mixture. If you find clumps of mung beans, you can discard them.

drain mixture

Prepare the steamer

Fill water half-way up the bottom pan of the steamer. Turn on the heat to medium-high. Place the steamer with holes on top. Place the silicone molds or any molds that you would like to use for your cake in the steamer. You can find the molds in the pictures on Amazon.com. I bought two types: bundt mold & different shape moldssillicon molds

Pour approximate 1 tablespoon of the green mixture in each small mold as the first layer. If you have bigger molds, use your best judgment on how much you would like the first layer to be. Close the lid. Set timer for 2 minutes. Once your first layer becomes transparent, you are ready to pour in the second layer. steamed layer cake

Pour in the yellow mixture layer. Once again, use your own judgment on how much. I use 1 tablespoon for mine. Close the lid. Set timer for 2 minutes. Continue the process with alternating colors until the mold is filled to the top.

For the last layer, set timer for 4 minutes to complete the steaming process. For the small mold, I generally make four layers.

Allow the cakes to completely cool before remove them from the molds. Otherwise, the cake may fall apart.

banh da lon in molds

You may find a more yellow mixture than the green mixture. You can make one color layer cake with the remaining color. It won’t be as colorful. However, it is still tasty.

Make up to 24 small cakes.

banh da lon

Love to hear your experiences. Please leave me your comments or questions below. I will get back to you within 24 hours.

Simple Almond Milk Recipe

almond milk in a glass

As I am getting older, my body needs more calcium and nutrition that milk has to offer. However, I did not grow up drinking milk in Vietnam so my body does not know how to process cow milk fat very well. I explored alternative milk such as soy milk and almond milk. I tasted both and I preferred the flavor of almond milk. almond milk in a glass

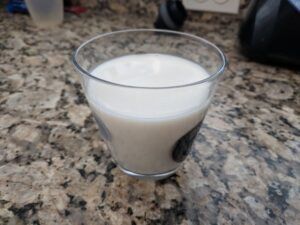
In the past, I have been drinking store-bought almond milk. It is definitely convenient and easy to find. However, recently my aunt shared with me a simple almond milk recipe that inspired me to make my own almond milk. My first thought was ugh… It is inconvenient and it’ll take a long time.

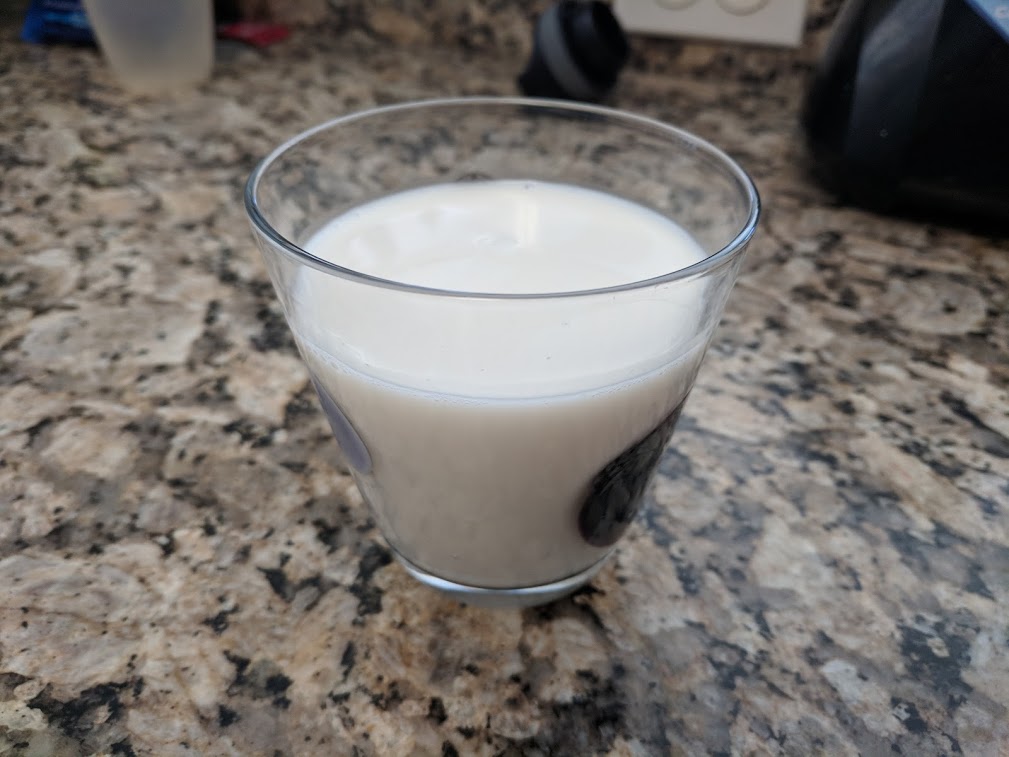
However, it is so yummy and delicious that I am willing to put in the extra effort to make it. In addition, the nutritional benefits are a bonus that the body is craving. The recipe is very simple. All you need are almonds, water, and optional sugar and/or vanilla.

Benefit of Almonds

First of all, if you have a reaction to peach or tree nut, you may not want to drink almond milk. It can instigate swelling, hives, diarrhea, vomiting, and other reaction that could lead to respiratory difficulties.

Other than allergy reactions as an exception for some, almonds contain many benefits for the body in general. It has excellent fat that is good for you. The fat is a composition of omega-3 and omega-6 fatty acids. These fatty acids lower cholesterol and blood pressure. They protect against cardiovascular and neurological diseases. My Vietnamese food diet does not contain a lot of fat so almonds are a great source of excellent fat for me.

Almonds are great sources of B vitamins which help raise your metabolic rate to burn fat and calories efficiently. They are also an excellent source of essential minerals such as iron, magnesium, phosphorous, zinc, copper, Vitamin E, and manganese which help improve skin quality and protection against cancer.

As the owner of this website, I tracked down special deals for some products or services mentioned herein. As an Amazon Associate, I earn from qualifying purchases. When you use the link from this page to make a purchase, I may receive a small commission, and you may receive a great bargain – Full Disclosure.

Soaking the Almondsalmonds

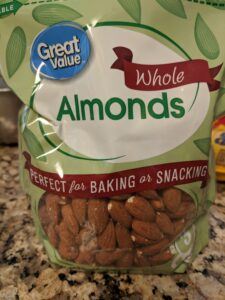
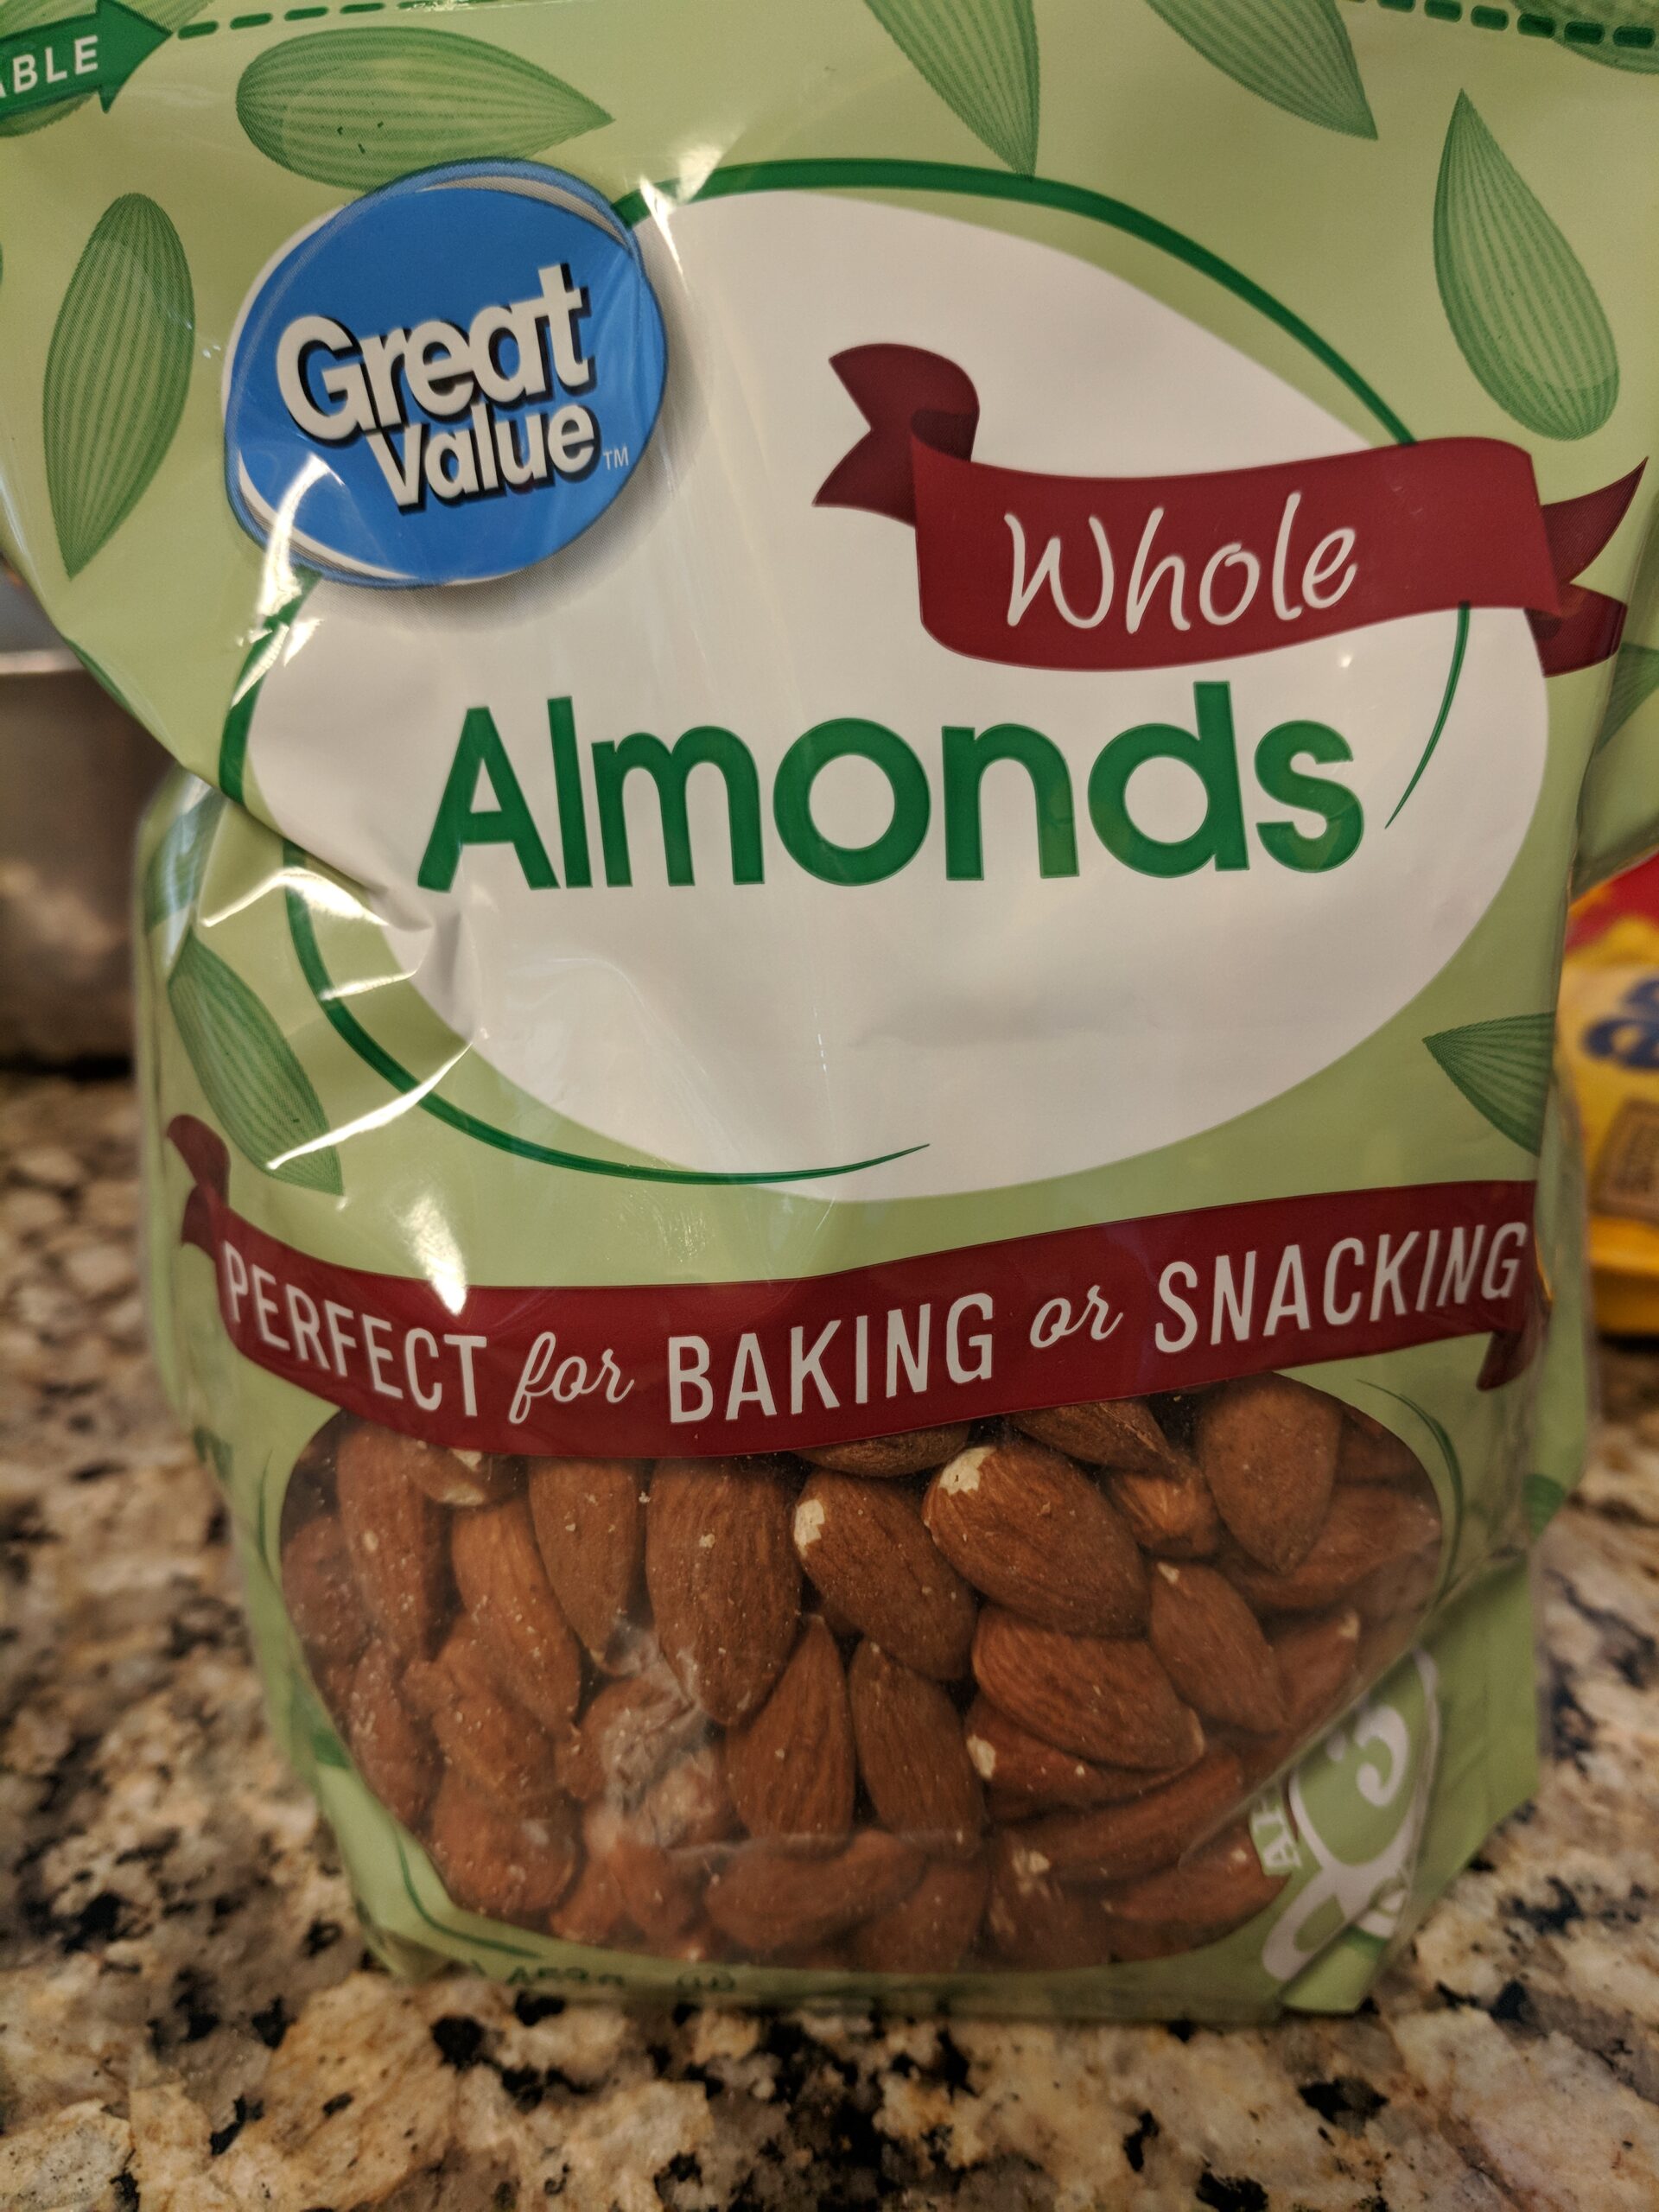
You can purchase almonds at wholefoods or regular grocery stores. Make sure that the almonds are not roasted, salted, or flavored in any way. I bought mine at Walmart. It’s your choice if you want your almond organic or not. For your convenience, I also create a link to Amazon for you to explore => CLICK HERE for Raw Almonds.

Soak 1 cup of almonds and water in a bowl overnight. Make sure the water covers the almonds. This helps activate their full nutrients and soften them so they can be ground easier in the blender.

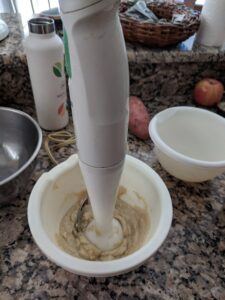
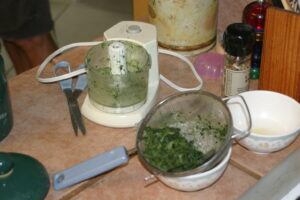
You can use any simple blender to pulverize the almonds. However, keep in mind the life of your blender. If it is a cheap blender and you intend to use it more often to create almond milk, more than likely the motor will give out quickly. My blender motor died after 3 months of making almond milk 2 to 3 times a week. I now use a Vitamix to make my almond milk.

Simple Amond Milk Recipe
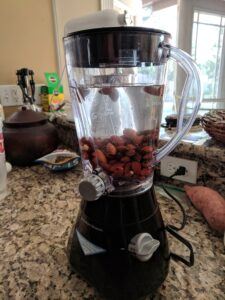
 almond in blender

Ingredients:

  • 1 cup Almonds (make sure they are not roasted, salted, or flavored in any way)
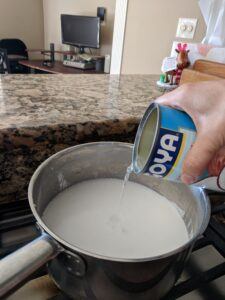
  • 5 to 6 cups filtered water
    2 1/2 tbsp honey (or your choice of sweetener such as stevia, maple syrup, pitted dates, etc)
  • 1 tsp vanilla (optional)

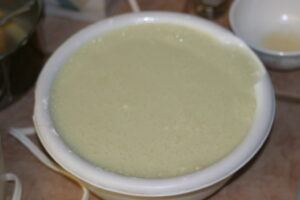
Once the almonds are soaked overnight, wash and drain the almonds until the water is nice and clear. Place the almonds in the blender.

Add filtered water. You can adjust the amount of water to your own liking. When you add less water the milk will be thicker and if you add more water the milk will be thinner. I found 5 cups of water work for me. Turn on the blender and blend for 5 to 6 minutes or until the almonds are pulverized and smooth. For the Vitamix, I only need to blend for 1 minute.

almond milk extract

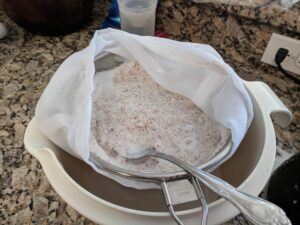
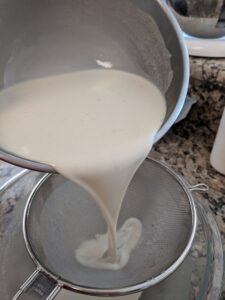
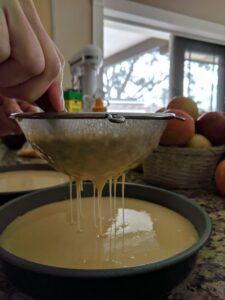
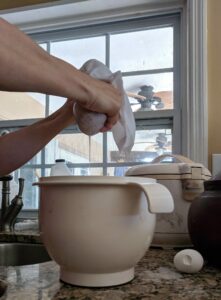
Strain the milk through a strainer and a cheesecloth material. You can make yourself a strainer milk bag from polyester material. You can also purchase one through Amazon – Click HERE to see what it looks like. Allow the strainer and the cloth to catch the almond pulp. Pour all the leftover pulp into the cloth. Gently squeeze as much liquid from the cloth as possible.

squeeze water

Place the almond pulp aside in another bowl. Add honey or your choice of sweetener to the almond milk and mix well. Keep it refrigerated until ready to drink.

What to Do with Almond Pulp?

almond pulp

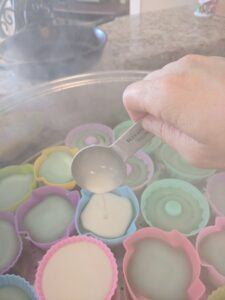
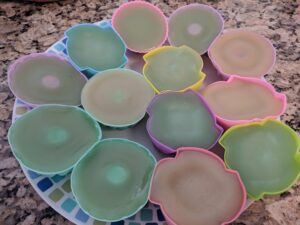
With the almond pulp, you can also make other delicious desserts or snacks. There are many recipes on the internet. They are fun and delicious. I am on a quest to find the perfect delicious protein bar recipe. I am mixing and matching to see what I can create. Here are a few recipes that I tried.

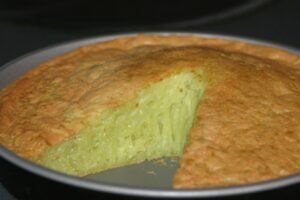
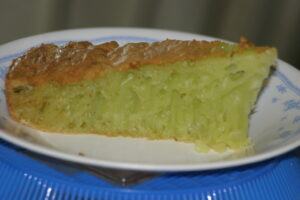
  • Almond Pulp Chocolate Chip Bars by TheVegan8.com. This was the first recipe I tried. It turned out really good. However, the bars are high in carbohydrates. My family wants more protein. So I did more digging and tried a few more recipes looking for the perfect tasty protein bar.
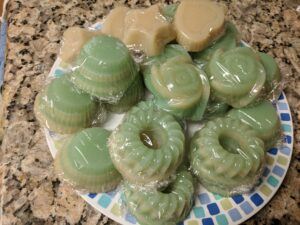
  • Banana Almond bread by the-salty-tomato.com -The banana bread was my next recipe. It was delicious and moist. Our new banana bread favorite. It is a great recipe for vegan lovers.
  • Almond Pulp Protein bars by fitrunningmomma.com. This bar was good however it was soft and gooey. It needs to be refrigerated or it’ll melt. =(
  • Homemade Protein Bars by ifoodreal.com. For this recipe, I substituted the almond meal with my almond pulp. I am not too fond of the Vega protein flavor. It tasted dry and flaky. I tried the whey protein and it was wet and gooey. However, I liked the whey flavor better.
  • Homemade Protein Bars (no almond flour or pulp) by Gluten-free on a shoestring – This is a fantastic protein bar recipe but no almond flour. =(I substituted a few ingredients with almond pulp. The almond pulp added wetness to the bars so it cannot get firm. I am still working out the balance of the ingredients.
  • Body scrub by HealthyBlenderRecipes.com –  I have not tried this recipe yet.  If you do please let me know how it works out for you.

Conclusion

Making my own almond milk rocks! The taste and the benefits are amazing. With homemade food, I can control the quality of my product. I can choose my own sweetener. The homemade almond milk can be as sweet as I like it. The milk can be as thick or as thin as I prefer. In addition, raw almond milk contains live enzymes with no additives or preservatives. I gain the fat and nutrients my body has been craving for.

Looking for more vegetable protein for your diet. Tofu is another great source of protein. Click Here to learn how to fry tofu.

I hope you find this article useful. Please leave a comment below to share your thoughts or your burning desire questions. If you come across a perfect homemade protein bar recipe, please let me know. I would love to try making it.

Bánh Bò Nướng Recipe – Vietnamese Honeycomb Cake

banh bo plate

Bánh Bò Nướng (Vietnamese Honey Comb Cake), a Vietnamese gluten-free dessert/snack. It’s a chewy, coconutty green cake often sold as slices on Styrofoam trays at Vietnamese bakeries. The color and tropical, grassy notes come from pandan leaves (lá dứa).  Make sure to read the instructions thoroughly before you start. This recipe yields two 9” round pancakes. Good luck and have fun!!!

As the owner of this website, I tracked down special deals for some products or services mentioned herein. As an Amazon Associate, I earn from qualifying purchases. When you use the link from this page to make a purchase, I may receive a small commission to support this website, and you may receive a great bargain – Full Disclosure.

Ingredients:

    • 10 eggs
    • 2 cups sugar
    • 1 can thick coconut milk (one can — 13.66 fluid oz or 403ml)

    • 4 cups tapioca starch (1 bag – 16 oz)

    • 6 to 8 pandan leaves, 1 tsp pandan extract, 1 tsp pandan extract, or 1 tsp vanilla


  • 2 packages (Alsa Brand) baking powder (single-acting) – 2½ tsp per package

Directions

  1. Leave the eggs out at room temperature for 10 to 15 minutes.
  2. Break the eggs gently into a bowl. Gently break the egg yolk with a fork. Try not to beat the eggs too hard or long. We only want to mix the yolk and the white together a little bit. Mixing the eggs too long will create bubbles in the cake when baking.
  3. Mix in sugar, coconut milk, and pandan leaves extract or vanilla (pandan leaves or pandan extract are optional – see further instruction below).
  4. Mix the tapioca starch into the mixture.banh bo flour mixture
  5. There will be flour clumps because of the tapioca starch texture. It’s ok. Do not over mix it. Gently mix it for no more than 5 minutes. Again over mixing will produce bubbles in the cake when baking.
  6. Add the baking powder (ATTN: this is not the regular baking powder at the grocery store. The grocery store sells double-acting baking powder. Please see the picture above for single-acting baking powder. You can usually find this brand at an Asian grocery store.)
  7. Mix in but don’t worry about the clumpy flour
  8. It is also normal for the mixture to be watery.
  9. Use butter or vegetable oil to lightly grease two 9” round pans
  10. Turn oven to bake at 350º F
  11. Put the pans into the oven to heat up the pans
  12. Use a strainer or a sieve to pour the mixture through and work out the flour clumps through the strainer.

    Straining and filtering the flour mixture
    Straining and filtering the flour mixture
  13. Pour the filtered mixture into the two pans.
  14. Bake at 350º F for about 45-50 mins or until golden.
  15. Use a toothpick to help measure when it is cooked. Cook until flour no longer stick to the toothpick.
    Bad Banh Bo Nuong with bubbles in the batter.
    Bad Banh Bo Nuong with bubbles in the batter.

    Perfect Banh Bo Nuong
    Perfect Banh Bo Nuong
  16. Optional – How to process the Pandan leaves: frozen bag pandan grinding pandan leaves

extract juice from pandan leaves

  • You can often find frozen Pandan leaves at an Asian market. Cut the leaves into 1 to 2 inches in length.
  • Place them in a small food processor or food chopper. Use your own discretion on the number of leaves that your food processor can handle at a time.
  • Put aside ¼ cup of coconut milk from the coconut milk. Add the coconut milk to the leaves.
  • Grind all the leaves & milk into fine green pulp
  • Use a strainer to extract all the green coconut milk from the pulp.
  • Keep the milk and discard the pulp.
  • Pour the milk into the mixture
  • Mix well.
  • You can avoid the laborious task of extracting the juice from the leaves by using pandan extract or regular vanilla. Vanilla flavoring is also good. However, it does not give the cake any color.

banh bo plate

Note: the pandan extract may contain food coloring, artificial flavoring, and/or preservatives. I prefer to use frozen leaves for natural flavoring and coloring.

I found information on single and double-acting powder at this website:

http://moonlake.hubpages.com/hub/Baking-Powder-Single-Acting-and-Double-Acting

Single Acting Gluten-Free Baking Powder Recipe

(The recipe of the cream of tartar can)

2 Tablespoons of cream of tartar

1 Tablespoon of baking soda

1 Tablespoon of cornstarch

Combine ingredients: store in an airtight container until needed. Makes 1/4 cup. This is gluten-free baking powder.

Love to hear your successes or failures. Please let me know how this recipe works for you. Leave your feedback below.

Happy Holidays 2017 – Vietnamese Appetizers

baguette

Like any food in many cultures, Vietnamese food can be fattening and decadent especially desserts. Even if the food is gluten-free or msg free, it can still be fattening.

The bottom line is that we can get fat when we eat too much of anything with no exercise in our everyday habits. The key to maintaining a healthy life is to eat fresh food and have them in moderate proportion with exercise or stay active in your daily routines.

With that being said, I would like to introduce one of my favorite Vietnamese appetizers, Bánh Mì, or also known as Vietnamese subway sandwiches. You can have it at any time. It can be a light snack or a meal. The three main differences between the regular subway sandwiches and Bánh Mì are the bread, the meat, and vegetables. That’s practically everything. Heeee heee heee…

The bread for Bánh Mì is the French banh-mi Vietnambaguette. I love the baguette because it is not thick with dough. The shell is usually light and crunchy while the inside is semi-hollow with softness. The meat is usually prepared as marinated grilled pork, chicken, fish, or a combo of all the meat combined. The vegetables are simple sour vegetables of daikon and carrots, cilantro, sliced cucumber, and optional jalapeno peppers. Yummy. Just thinking of it my mouth salivate with anticipation.

Curious to know more about Bánh Mì and would like to taste it before you try to make it? There will be a free demonstration on how to make Bánh Mì. Come and join Pho Queen this coming Thursday at 6:30 pm, December 21, at the Orange County Public Library downtown to learn how to make a Vietnamese appetizer called Bánh Mì or Vietnamese subway sandwiches. Seats are limited. Call to reserve your seat today – 407-835-7323.

I finally submitted two chapters of “My Journey to America” so far. It took me quite a while to summon the courage to finally share with everyone my story. I am have been hesitating for years. I was afraid my story is not good enough, my grammar is horrible, etc… Well, here they are an introduction to my journey to America and the Vietnam War. I love to hear your thoughts on what I have so far. Thank you!!!

My-journey-to-america-an-introduction/

My-journey-to-America-Vietnam-war/


See you at the demo!!!

Love to hear your thoughts on our newsletters and blogs – Please leave your comments below.

Looking forward to seeing you soon! Happy Eating Healthy!

Pho Queen

https://Tastyphoqueen.com